

How to Use Crutches Properly: Stairs, Sitting and Not Falling
Key Takeaways
- Fit crutches so the pads sit two finger-widths below your armpits and the handgrips align with your wrist crease, leaving a slight 15–30 degree elbow bend.
- Your palms, not your armpits, carry your weight; sustained armpit pressure can compress the radial nerve and cause tingling or hand weakness known informally as crutch palsy.
- A single crutch belongs on your good side, moving forward in sync with the injured leg to widen your base exactly when the weak leg needs support.
- On stairs, the strong leg leads going up and the crutches-plus-injured-leg lead going down, "up with the good, down with the bad."
- Plant crutch tips only about 12 inches ahead of your feet; overreaching loads the crutch at an angle and is one of the top causes of slips.
- Sit by backing up until the chair touches your good leg, moving both crutches to one hand, and lowering yourself with your free hand on the armrest.
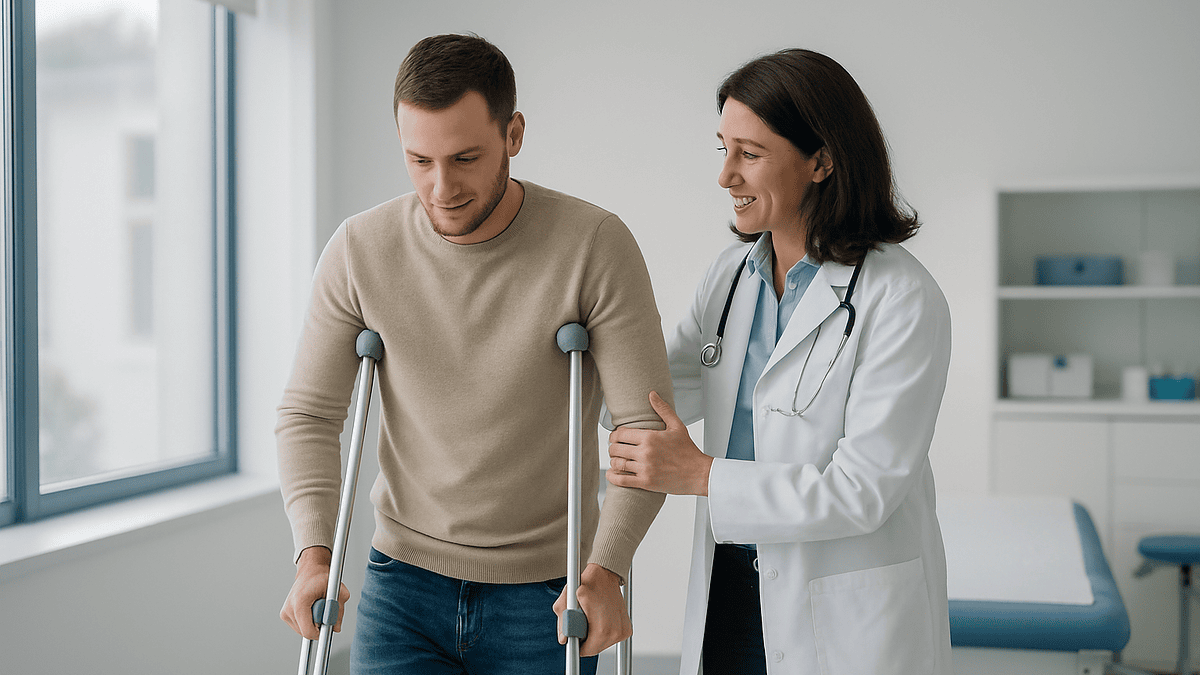
To use crutches safely, set the tops two finger-widths below your armpits and carry your weight through your hands, never your armpits. Move both crutches forward together with your injured leg, then step through with your strong leg. On stairs, remember: lead up with your good leg, and lead down with the crutches and your injured leg.
Most people get their crutch training in about ninety seconds, standing in a hallway, still woozy from the emergency department or the recovery room. Someone adjusts a wing nut, says “up with the good, down with the bad,” and hands over the discharge papers. Then you’re home, staring at a staircase, holding two aluminum poles that suddenly feel like stilts.
That gap between the demo and real life is where trouble starts. Crutches are genuinely safe tools, millions of people recover on them every year, but they punish small errors. Lean on your armpits for a week and your hands can go numb. Reach the tips too far forward and they can slide out from under you like ski poles on ice.
Here’s the fuller lesson: how to fit them, walk with them, manage stairs and chairs, and sidestep the mistakes that send people back to the hospital for a second, avoidable injury.
Why crutch fit comes before everything else
Badly fitted crutches make every other technique harder, so start here, with your everyday shoes on, standing as tall as your injury allows.
- Top of the crutch: the pad should sit about two finger-widths (roughly 1.5 to 2 inches) below your armpit when the tip rests a few inches out from your foot. It should never press up into the armpit itself.
- Handgrip: level with the crease of your wrist when your arm hangs relaxed at your side. When you grip the handle, your elbow should bend slightly, around 15 to 30 degrees, per standard fitting guidance echoed by MedlinePlus and Cleveland Clinic.
- Overall height check: a common rule of thumb puts total crutch length at your height minus about 16 inches, but the armpit-gap and wrist-crease tests matter more than any formula.
Two more details deserve a look before your first lap around the living room. Check the rubber tips: they should be intact, gritty and firmly attached, because a worn tip on smooth flooring behaves like a bald tire. And tighten every bolt and push-button after adjusting: a crutch that telescopes mid-step is a fall waiting to happen.
If the crutches were fitted while you wore hospital socks and you’ll be walking in sneakers, refit them. A one-inch sole change is enough to throw off the geometry, and you’ll feel it in your shoulders within a day.
Should your armpits carry your weight? No, and here's the nerve that pays for it
This is the single most consequential rule of crutch use, and the one people break most often because it feels natural: do not hang your body weight on the armpit pads.
The reason is anatomical. A bundle of nerves and blood vessels, including the radial nerve, which powers your wrist and finger extension, runs through the armpit close to the surface. Sustained pressure there can compress those nerves and produce what clinicians informally call “crutch palsy”: tingling, numbness, and in stubborn cases genuine weakness in the hand and wrist. It usually improves once the pressure stops, but recovery can take weeks, which is a miserable bonus injury when you’re already down one leg.
The correct load path is simple. Your weight travels through straight-ish arms into your palms on the handgrips. The underarm pads exist to be squeezed lightly between your upper arms and your ribcage, think of them as stabilizers pinned against your sides, not shelves to rest on. That squeeze is what keeps the crutches from splaying outward as you swing through.
A quick self-test: after five minutes of walking, where are you sore? Tired triceps and palms mean you’re doing it right; aching armpits mean you’re leaning. And if your hands or forearms start tingling at rest, treat that as a signal, not a nuisance, recheck your fit and mention it to your care team.
What foot goes first when using crutches?
The crutches and the injured leg travel together; the strong leg follows. That’s the whole pattern, and it’s worth rehearsing slowly before you trust it at speed.
For the standard three-point gait, the one most people use after a leg or ankle injury, it looks like this:
- Stand tall, weight on your good leg, crutch tips beside your feet.
- Move both crutches forward about 12 inches (30 cm), no farther.
- Bring your injured leg forward level with the crutches. If you’re not allowed to bear weight, hold that foot off the floor; if you have partial clearance, let it touch as prescribed.
- Press down through the handgrips, and step your strong leg forward to meet or slightly pass the crutches.
Then repeat. The rhythm is crutches-and-bad, then goodsome physical therapists teach it as a waltz count to keep steps short and even.
Two habits make or break this gait. First, keep your eyes on where you’re going, not on your feet; looking down curls your posture forward and shifts weight onto your armpits. Second, resist the urge to take long, athletic swings. A crutch planted far ahead of you is loaded at an angle, and angled tips slip. Small steps look slower but cover ground faster than one fall does.
Practice on a firm, dry, clutter-free surface first, a hallway, not a kitchen, until the sequence stops requiring thought.
Do you use a crutch on your good side or your bad side?
The good side, and this surprises almost everyone. Instinct says to prop up the injured side directly, but mainstream guidance from sources like MedlinePlus is clear: a single crutch or cane belongs in the hand opposite the injured leg.
The mechanics explain it. When you walk normally, your arms and legs swing in opposition, right arm forward with left leg. Holding the support on the strong side preserves that natural reciprocal pattern, so the crutch moves forward at the same moment as your injured leg. Together they form a wide, stable base exactly when your weak leg needs the help, and part of your body weight detours through the crutch instead of through the healing limb.
Hold it on the same side as the injury and the opposite happens: your base narrows, your trunk tilts toward the injury, and you develop a lurching gait that strains your hip and lower back. Studies of cane use consistently show better offloading of the affected joint when the aid is used contralaterally, on the other side.
The sequence with one crutch mirrors the two-crutch pattern: crutch and injured leg advance together, strong leg steps through. Keep the step lengths equal on both sides; a common tell of poor technique is a long stride on the good leg and a timid shuffle on the bad one, which slowly trains in a limp you’ll have to untrain later.
What is the correct way to use one crutch?
One crutch is a graduation, not a starting point, appropriate only after your clinician confirms your injured leg can take meaningful weight. Used too early, it quietly overloads the healing limb with every step.
When you’re cleared, the technique is straightforward:
- Hold the crutch on your strong side, hand on the grip, pad squeezed against your ribs.
- Move the crutch and your injured leg forward together, a modest step’s length.
- Press through the handgrip as your injured leg bears weight, then step through with your strong leg.
- Keep your posture upright and your gaze forward: the single-crutch stage is where people unconsciously start leaning sideways.
Two honest cautions. First, one underarm crutch is an awkward in-between tool; at this stage, some care teams switch patients to a cane or a forearm crutch, which are designed for exactly this level of support. Ask rather than improvise. Second, stairs with a single crutch demand a railing. Use the rail with one hand, the crutch in the other, and follow the same rules as always: good leg leads going up, crutch and injured leg lead going down. No railing? Take the elevator, or go back to two crutches for the climb.
Expect this phase to feel oddly harder than two crutches for the first day or two. Your body is relearning symmetry, and short, even, deliberate steps are the whole assignment.
How do you go up stairs on crutches?
The mnemonic taught in nearly every physical therapy gym is “up with the good”: your strong leg does the lifting, and everything else follows it.
With a railing (always the safer option when one exists):
- Hold the railing with one hand and tuck both crutches under the opposite arm, using them together like a single crutch.
- Push down through the rail and the crutch grip, and step up with your good leg onto the next step.
- Straighten that leg, then bring the crutches and your injured leg up to the same step.
- Pause, balance, repeat. One step at a time, never two.
Without a railing, keep a crutch under each arm and use the same order: good leg up first, then crutches and injured leg together. This version demands more balance, so it’s worth having someone stand a step or two behind you the first few times, behind, because that’s the direction you’d tip.
Why the good leg leads: climbing a step requires one leg to lift your entire body weight plus the crutches. That job belongs to the healthy leg. If the injured leg went first, it would either take that load or leave you stranded mid-step with nothing solid beneath you.
Feeling shaky, or facing a long flight while exhausted? There’s no shame in the seated scoot: sit on a lower step, keep the injured leg forward, and push yourself up one step at a time with your arms and good leg, crutches carried alongside. Slow, undignified, and dramatically safer than a wobbling climb.
How do you go down stairs without falling?
Descending is where crutch users get hurt, so it deserves more respect than the climb. Gravity is now working with your momentum instead of against it, and a small overbalance forward becomes a headlong fall. The rule flips accordingly: “down with the bad.”
- Stand at the edge of the step, toes short of the lip, weight on your good leg.
- Lower both crutches (or crutch plus railing hand) down to the step below.
- Bring your injured leg down and forward to join them, bearing weight only as prescribed.
- Press firmly through the handgrips, then step your good leg down last, controlling the descent with your arms.
The logic mirrors the climb in reverse. Lowering your body is a controlled fall, and your strong leg is the brake, so it stays on the higher step doing the braking until everything else is safely down.
Three habits protect you here. Keep a slight backward lean; leaning out over the stairs to “see better” shifts your center of gravity past the edge. Place crutch tips fully on the tread, not perched on the lip where they can skate off. And never rush a descent while carrying anything: a phone in one hand on a staircase is how a manageable injury becomes two.
If the stairs are carpeted, wet, or unusually steep, or you’re taking medication that dulls alertness, use the seated scoot going down too. Evidence-based care is full of humble solutions that work.
How do you sit down and stand up with crutches?
Chairs cause more crutch stumbles than people expect, mostly because everyone tries to sit facing the seat and lower themselves blind. The safe method is the reverse: back in.
To sit:
- Turn and back up until you feel the chair’s edge against the back of your good leg. That touch is your confirmation, never trust a glance over the shoulder.
- Move both crutches to one hand, gripping them by the handgrips like a single pole.
- Reach back for the armrest (or seat edge) with your free hand.
- Slide your injured leg forward, and lower yourself slowly using your arms and strong leg.
- Lean the crutches upside down against a wall or table nearby, tips up. Balanced upright, they clatter to the floor and end up out of reach exactly when you need them.
To stand: scoot to the front edge of the seat, injured leg extended forward. Hold both crutches by the grips in one hand, push up with the other hand on the armrest and your strong leg, find your balance fully, then distribute the crutches under each arm. Standing up already tucked into both crutches robs you of a free hand for the hardest part.
Choose your furniture for the next few weeks deliberately: a firm chair with armrests beats a deep sofa you’ll sink into, and anything on wheels, office chairs especially, should be off-limits. A low, soft seat can turn standing up into a genuine strength event three times a day.
What are the three most common mistakes people make on crutches?
Ask physical therapists and the same trio comes up again and again.
1. Resting body weight on the armpits. The most common and most consequential error. It feels restful, and it steadily compresses the nerves of the armpit, hence the tingling hands that bring people back to clinic. Weight belongs in your palms; the pads only get a light squeeze against your ribs. If your armpits ache after walking, your technique or your fit is off.
2. Planting the crutches too far ahead. Long reaches feel efficient, but a crutch angled far in front of you is loaded like a ski pole and can shoot forward on smooth floors. Keep the tips about 12 inches ahead of your feet, and keep them slightly out to the side, tips planted too close together narrow your base and invite a sideways wobble.
3. Getting the stair order backward. Under stress, people forget the mnemonic and lead upstairs with the injured leg or downstairs with the good one, both of which either overload the healing limb or leave nothing to brake with. Rehearse “up with the good, down with the bad” until it’s automatic, and say it out loud at the top of a staircase if you need to. Nobody’s judging.
Honorable mentions: worn rubber tips, walking in socks or flip-flops instead of grippy flat shoes, and carrying a coffee mug in one hand. Every one of those has ended in an X-ray.
How do you crutch-proof your home?
Falls at home rarely come from dramatic missteps; they come from a throw rug, a phone charger cable, or a wet patch of tile. The CDC’s fall-prevention research keeps landing on the same fixable hazards, and every one of them matters double when you’re on crutches. Spend twenty minutes on this before your first full day home.
- Floors: roll up loose rugs, tape down or reroute cords, and clear a wide path through every room you’ll actually use. Wipe up spills immediately, crutch tips grip dry floors well and wet ones barely at all.
- Light: add night-lights along the bedroom-to-bathroom route. A remarkable share of crutch falls happen in the dark on a half-asleep 2 a.m. trip.
- Bathroom: a shower chair and a rubber-backed bath mat are inexpensive and earn their keep the first morning. Never step into a tub while holding crutches.
- Carrying things: your hands are now landing gear. Use a small backpack or a crossbody bag, keep water in a bottle with a lid, and slide plates along the counter rather than carrying them.
- Pets and kids: a cat weaving through crutch tips is a legitimate hazard. Consider a baby gate for the first week.
- Tips maintenance: dry the rubber tips when you come in from rain, and inspect them weekly for wear or embedded grit.
One more habit: turn with small steps in a semicircle rather than pivoting in place. A twist on a planted crutch, or worse, on the injured leg, is a classic re-injury mechanism.
What does your weight-bearing status actually mean?
Discharge papers often carry a phrase like “NWB” or “partial weight-bearing” with little explanation, yet it’s the instruction your entire crutch technique hangs on. Here’s the standard ladder, from most to least restrictive:
| Status | What it means in practice |
|---|---|
| Non-weight-bearing (NWB) | The injured foot never takes weight and stays off the floor. Both crutches, three-point gait, injured leg held slightly forward. |
| Touch-down / toe-touch (TTWB) | The toes may rest on the floor for balance only, think of an egg under your foot that must not crack. No real load. |
| Partial weight-bearing (PWB) | A prescribed fraction of your body weight, often described as roughly 25–50%, goes through the injured leg, with crutches taking the rest. |
| Weight-bearing as tolerated (WBAT) | Pain is your guide. Put down as much weight as feels acceptable, using crutches until your gait normalizes. |
Partial weight-bearing is the hardest to judge by feel, and a bathroom scale makes it concrete: stand with your good leg on the floor and your injured foot on the scale, then practice pressing until the dial reads your target. A few minutes of this calibrates your sense of “half my weight” surprisingly well, most people guess badly without it.
If your paperwork doesn’t say which status applies to you, call and ask before your first day of real walking. Guessing conservative is safer than guessing bold, but guessing at all is the actual problem: bones and repaired tendons heal on load schedules, and the instruction exists to protect the surgical or fracture site at its weakest.
Crutches hurt your hands, wrists or ribs, what actually helps?
Some soreness is honest labor: your arms are suddenly doing work your legs used to do, and palms, triceps and shoulders will complain for the first several days. But pain has a grammar worth reading.
Sore palms and mild wrist ache usually mean pressure, not damage. Padded handgrip covers (or a folded washcloth secured with tape, in a pinch) spread the load, and padded cycling-style gloves help many people. Recheck that the grips sit at your wrist crease, grips set too low force your wrists into extension with every step.
Rib and side soreness typically comes from squeezing the underarm pads too hard or from pads set too high, jamming into the armpit with each swing. Re-measure the two-finger gap.
Numbness or tingling in the hands is the one to take seriously. It suggests nerve compression, either at the armpit from leaning, or at the wrist from prolonged pressure on the palms. Fix the technique, shorten your walking sessions, and if the tingling persists at rest or you notice weakness gripping objects, contact your care team rather than pushing through. Nerve irritation caught early tends to resolve; ignored, it lingers.
Pacing helps everything on this list. Break long distances into segments with seated rests, plan errands around available chairs, and accept that a two-crutch day burns noticeably more energy than normal walking, measurably more, in gait studies. Fatigue degrades technique, and degraded technique is where falls live. Sitting down for five minutes is a safety strategy, not a defeat.
When should you see a doctor?
Most crutch aches are self-limiting. These situations are different, and each deserves a call to your care team rather than a wait-and-see:
- Numbness, tingling or weakness in your hands that persists when you’re resting: a possible sign of nerve compression from crutch pressure.
- New or sharply worsening pain in the injured limb, especially pain that changes character, spreads, or wakes you at night.
- A fallany fall, even if you feel fine afterward. Impacts can disturb a healing fracture or surgical repair without immediate dramatic symptoms.
- Signs of infection if you had surgery: spreading redness, warmth, drainage, or a fever.
- Changes under a cast or boot: toes that turn pale, blue or cold, worsening swelling, or numbness in the foot.
- Calf swelling, warmth or tenderness in either leg. Reduced mobility raises the risk of a blood clot (deep vein thrombosis), and a swollen, tender calf should be assessed promptly.
Seek emergency caredon’t wait for a callback, for sudden shortness of breath, chest pain, or coughing up blood, which can signal a clot that has traveled to the lungs.
One quieter reason to check in: if you’re still struggling with basic crutch skills after a few days of honest practice, ask about a physical therapy session for gait training. A single half-hour with a professional watching you walk fixes more problems than a month of guessing, and it’s a routine, unremarkable request.
Would forearm crutches, a knee scooter or a walker suit you better?
Underarm crutches are the default in the United States, but the default isn’t automatically the best match for your body or your recovery timeline. It’s a fair question to raise with your clinician or physical therapist, and the honest answer depends on three things: how long you’ll be on the device, which leg segment is injured, and how strong your balance and grip are.
- Forearm crutches (with a cuff around the forearm) shift control from the armpit to the arm itself. They demand a bit more coordination up front but reward it with better posture, freer hands, and no armpit pressure, which is why they’re the standard choice in much of Europe and the usual recommendation for anyone facing months rather than weeks on crutches.
- Knee scooters suit below-the-knee injuries with strict non-weight-bearing orders. Kneeling the injured leg on the padded platform and pushing with the good leg is faster and far less tiring than crutching, though scooters handle stairs and tight bathrooms poorly and require decent balance.
- Walkers trade speed for stability. For anyone with balance concerns, upper-body weakness, or an injury on top of an existing mobility issue, a walker’s four points of contact are often the wiser call, particularly for older adults, for whom a second fall carries real stakes.
None of these is a self-service decision. Weight-bearing rules, wound location and your home layout all factor in, and insurance coverage often follows a clinician’s specific recommendation. Ask early, switching devices two weeks in, after your hands are already sore, is the harder road.
Frequently asked questions
What are three common mistakes people make using crutches?
The big three are leaning body weight on the armpits (which can compress nerves and cause tingling hands), planting the crutch tips too far ahead so they slip out like ski poles, and reversing the stair order, leading up with the injured leg or down with the good one. Runners-up include worn rubber tips, unsupportive footwear, and trying to carry items in your hands instead of a backpack.
Do you use a crutch on your good or bad side?
On your good side. Holding a single crutch opposite the injured leg preserves your natural arm-leg swing, so the crutch and the weak leg move forward together, forming a wide, stable base at the moment of greatest load. Holding it on the injured side narrows your base and creates a sideways lurch that strains the hip and back. The same contralateral rule applies to canes.
What foot goes first when using crutches?
The injured leg moves first, together with both crutches. Advance the crutch tips about 12 inches, bring the injured leg level with them (bearing weight only as prescribed), then press through the handgrips and step your strong leg through. The rhythm is crutches-and-bad-leg, then good leg. On stairs the order changes: the good leg leads going up, and the crutches with the injured leg lead going down.
What is the correct way to use one crutch?
Hold it on your strong side, move the crutch and your injured leg forward together, then step through with the good leg, keeping steps short and even. Switch to one crutch only after your clinician confirms the injured leg can bear meaningful weight, using it too early overloads the healing limb. On stairs, use a railing with your free hand, or return to two crutches.
How far ahead should I place my crutches when walking?
About 12 inches (30 cm) in front of your feet, and slightly out to the sides. That keeps the crutches loaded close to vertical, where the rubber tips grip best. Reaching farther feels faster but angles the crutch so the tip can skate forward on smooth flooring, one of the most common causes of crutch falls. Short, even steps are both safer and, over a full hallway, genuinely quicker.
Why do my armpits hurt after using crutches?
Almost always because you’re resting body weight on the underarm pads instead of driving it through your hands. The armpit contains superficial nerves and blood vessels, and sustained pressure there causes soreness first, then tingling or numbness in the hands. Re-check your fit, pads two finger-widths below the armpit, grips at the wrist crease, and treat the pads as stabilizers to squeeze lightly against your ribs, not shelves to lean on.
How do I carry things while on crutches?
Keep your hands empty and let a bag do the work. A small backpack or crossbody bag carries phone, keys and a lidded water bottle safely; for food at home, slide plates along countertops or use travel mugs with sealed lids. Carrying anything in your hand compromises your grip on the crutch and removes the free hand you’d need to catch yourself: a large share of crutch falls involve exactly that.
Can I use crutches on wet or icy surfaces?
With great caution, and sometimes not at all. Rubber crutch tips grip dry surfaces well but lose most of their traction on wet tile, polished stone, or ice. Dry your tips on a doormat when coming indoors, take half-length steps on damp ground, and avoid ice entirely if you can, reschedule, ask for help, or use a different entrance. A single crutch slip on ice can undo weeks of healing in a second.
How long does it take to get used to crutches?
Most people feel reasonably confident on flat ground within two to three days of regular practice, and comfortable with stairs and chairs within about a week. Expect real fatigue at first, crutch walking demands measurably more energy than normal walking. If basic skills still feel precarious after several days, ask your care team about a gait-training session with a physical therapist; one supervised half hour typically resolves lingering technique problems.
When should I call a doctor about crutch problems?
Call promptly for hand numbness or tingling that persists at rest, weakness gripping objects, any fall, new or worsening pain in the injured limb, or calf swelling and tenderness, which can signal a blood clot from reduced mobility. Seek emergency care for sudden shortness of breath or chest pain. Also report cast or boot changes such as pale, cold or numb toes. These are situations to assess, not push through.
References
- Using crutches: MedlinePlus Medical Encyclopedia
- Crutches: Cleveland Clinic
- Older Adult Falls Prevention: CDC
- Falls: MedlinePlus
This article is for general information only and is not a substitute for professional medical advice. Please consult a qualified doctor about your individual situation.

More from the Blog

Scar Tissue Massage: When It Helps, How It Is Done, and When to Leave Scars Alone
Scar tissue massage can help soften, flatten, and desensitize a healing scar once the wound has fully closed and a clinician has cleared you,…

Who Is Referred for Clinical Nutrition Therapy? Diabetes, Kidney Disease and Surgery Recovery
Medical nutrition therapy is usually recommended for people whose eating pattern directly affects a diagnosed condition: most often type 1 or type 2 diabetes,…
What a Chronic Wound Care Visit Involves: Assessment, Debridement, Dressings and Compression
A wound care appointment usually begins with a review of your health history and medicines, followed by measuring and photographing the wound, checking circulation…

Monoplace vs Multiplace Hyperbaric Chambers: What Changes for You During Oxygen Therapy
A monoplace hyperbaric chamber treats one person lying in a clear acrylic tube, usually pressurized with pure oxygen. A multiplace chamber is a walk-in…
What a Chronic Wound Care Visit Involves: Assessment, Debridement, Dressings and Compression
At a wound care appointment, a clinician reviews your health history, examines and measures the wound, and checks circulation and sensation in the surrounding…

Driving After Knee or Hip Replacement: The Honest Timelines
Most people are cleared to drive about four weeks after a right knee replacement and four to six weeks after a right hip replacement,…