

How to Tape a Knee: Step-By-Step Methods for Support, Pain Relief and Sport
Key Takeaways
- Rigid zinc-oxide tape does not stretch and is the type studied for shifting the kneecap; elastic kinesiology tape recoils and provides skin stimulation rather than mechanical control.
- Research finds taping often reduces front-of-knee pain immediately after application, but the effect is small, short-lived and no substitute for strengthening the hip and thigh.
- Rigid patellar taping should be tested with a step-down or shallow squat straight after application and reapplied if the painful movement does not improve.
- The ends of elastic tape must be applied with zero stretch and the knee bent to a right angle, or the strips will lift within hours.
- Tape sits on the skin and cannot reposition or splint a torn meniscus, which lies deep inside the joint; a locking knee needs medical assessment.
- NHS guidance says most sprains and strains feel better after about two weeks but advises avoiding strenuous exercise for up to eight weeks, regardless of whether the knee is taped.
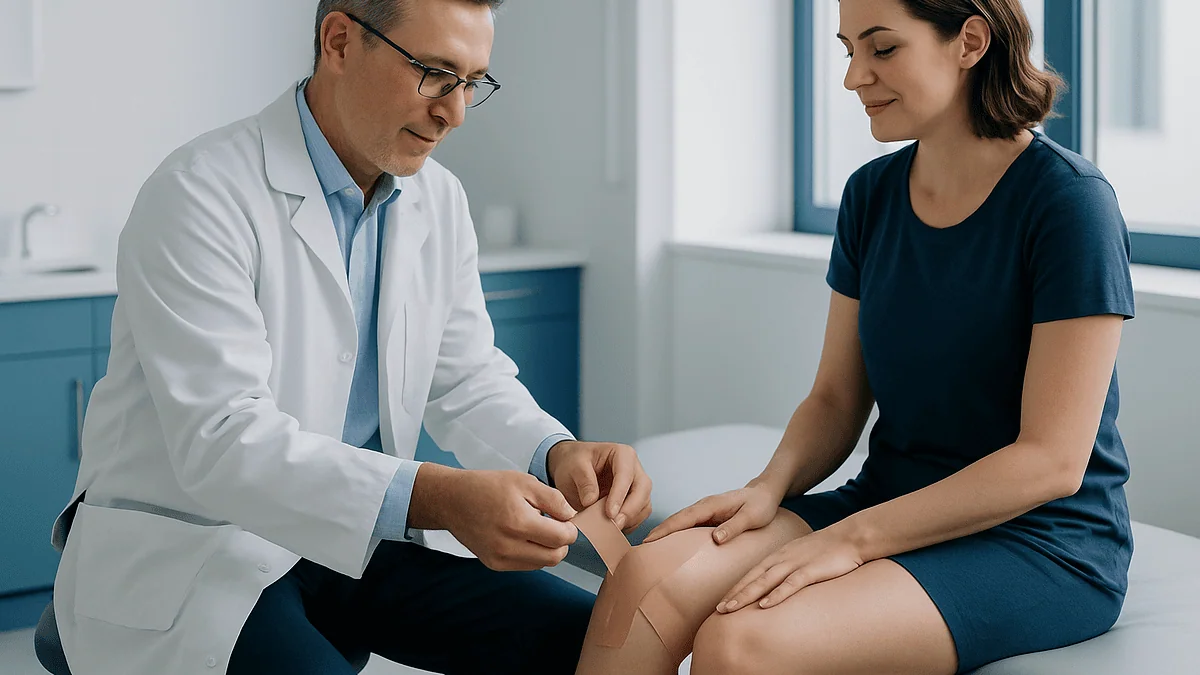
To tape a knee, clean and dry the skin and bend the knee slightly. For front-of-knee pain, anchor rigid tape on the outer edge of the kneecap and draw it gently inward. For general support, run elastic tape from mid-thigh around both sides of the kneecap to the shin with light stretch. Taping may ease pain short term; it works best alongside exercise.
Stand near the start corral of any half marathon and you will see it: strips of bright tape fanned across kneecaps in shapes that look half anatomy diagram, half street art. Some of those runners applied it in a physiotherapy clinic. Many did it on the bathroom floor that morning, following a video paused on a phone propped against the sink.
What surprises people is not how the tape looks but how quickly a knee can feel different once it is on. A step down feels steadier. A squat that pinched now merely nags. The change is real enough to be worth understanding, and modest enough to deserve some honesty.
This guide walks through the two families of tape, the exact landmarks to find on your own leg, three step-by-step methods, and the questions people actually type into a search bar at 6 a.m. on race day, including whether tape can do anything for a meniscus.
Will taping my knee help knee pain? What the evidence really shows
The short answer is: sometimes, a little, and mostly in the short term. That is not a dismissal. For a person who cannot get through a flight of stairs without a wince, a small reduction in pain is the difference between doing their rehabilitation exercises and skipping them.
Here is what mainstream reviews of the research say. Studies of rigid patellar taping for pain at the front of the knee, the condition doctors call patellofemoral pain, have found that people often report less pain immediately after the tape goes on. The quality of that evidence is mixed, the effect tends to fade once the tape comes off, and taping alone has not been shown to change the long-term course of the problem. Studies of elastic kinesiology tape tell a similar story: small, short-lived pain relief that is frequently no greater than a placebo application, with little evidence that it materially changes strength, alignment or performance.
Why might it help at all? Two mechanisms are plausible. Tape stimulates the skin, and that constant sensory input may compete with pain signals travelling from the joint, the same reason rubbing a bumped shin feels better. Rigid tape can also shift the kneecap slightly for a few minutes and, more importantly, remind the brain where the joint is in space, which may improve how the thigh muscles fire during a step or squat.
My view, grounded in that evidence: treat tape as a way to make movement tolerable while you do the work that actually changes the knee, which is strengthening the hip and thigh and adjusting load. Mayo Clinic describes patellofemoral pain as common in runners and people who do jumping sports, and its management leans on rest from aggravating activity and targeted exercise, not on tape.
Rigid tape or elastic tape? Two tools for two different jobs
Walk into a pharmacy and you will find two very different products under the same shelf label. Confusing them is the most common reason a taping attempt disappoints.
Rigid tape is the stiff, tan-colored, zinc-oxide-adhesive strapping used in sports medicine for decades. It does not stretch. That is its whole point: it can hold a kneecap a few millimeters to one side or limit how far a joint drifts. Because it is unforgiving on skin, it is usually applied over a soft foam or fabric underwrap.
Elastic kinesiology tape is the colorful cotton tape that stretches along its length and recoils. It cannot hold anything still. What it offers is skin stimulation, a gentle sense of support, and comfort during movement. Most people find it far kinder to the skin and easier to apply alone.
| Feature | Rigid tape | Elastic kinesiology tape |
|---|---|---|
| Stretch | None | Stretches lengthwise and recoils |
| Main purpose | Repositioning or limiting movement | Sensory feedback and comfort |
| Best-studied use at the knee | Pain at the front of the knee | General knee discomfort, sport |
| Skin tolerance | Lower; underwrap usually needed | Higher; test a patch first |
| Ease of self-application | Harder; technique matters | Easier; forgiving of small errors |
| Typical wear | Removed the same day or next | Left on for several days per packaging |
If your problem is a kneecap that seems to track toward the outside and aches on stairs, rigid tape is the better-studied tool. If your knee simply feels vague and unsupported during running or you want a reminder to move well, elastic tape is the sensible first try.
Where should I tape my knee? Finding the landmarks on your own leg
Every taping method depends on four landmarks, and you can find all of them sitting on the edge of a bed with the leg relaxed.
Start with the kneecap, the patella. Cup it with your fingertips and rock it gently side to side; it should glide a little. Feel its four borders: top, bottom, inner edge closest to the other knee, and outer edge. Almost every strip of tape either sits on these borders or travels around them, because the patella and the tendon below it are where front-of-knee pain lives.
Next, find the joint line. Bend the knee slightly and slide a thumb down either side of the kneecap until it drops into a horizontal groove between the thigh bone and the shin bone. That groove is where the menisci and the collateral ligaments sit. Side-support methods span this line.
Third, the tibial tubercle: the firm bump on the front of the shin a few finger-widths below the kneecap, where the patellar tendon attaches. Elastic support strips usually anchor here.
Finally, note the direction of your hair growth on the thigh, because you will remove tape along it later.
Where you should not tape is just as useful. Avoid the soft hollow at the back of the knee, where tape bunches, chafes and irritates. Keep tape off broken, sunburned or recently shaved and reddened skin. Do not wrap tape fully around the leg in a tight ring; that creates a tourniquet effect rather than support. MedlinePlus lists numbness, tingling or a cold, pale foot as signs that circulation is compromised, and tape should come off immediately if any of those appear.
Before the first strip: preparing skin and tape properly
Adhesive is chemistry, and chemistry is fussy about surfaces. Most tape failures trace back to the two minutes before the tape ever touched the leg.
Clean the skin with plain soap and water, then dry it thoroughly. Skip moisturizer, sunscreen and body oil that day, because any residue forms a barrier between adhesive and skin. If the area is very hairy, trim it with clippers a day or so ahead rather than shaving right before taping; a fresh shave leaves micro-abrasions that sting under adhesive and raise the risk of irritation.
Test the tape. Stick a small strip on your forearm and leave it for as long as you intend to wear the full application. Itching, burning or a raised red outline means this adhesive is not for you. Elastic tapes vary in their glue, and some people who react to one tolerate another.
Cut every piece before you start. Round the corners with scissors; square corners peel within hours. For elastic tape, measure each strip against your own leg with the knee bent rather than trusting a printed length.
Position the knee correctly for the method you are using: slightly bent for rigid patellar taping, bent to a right angle as if sitting in a chair for most elastic methods. The skin over a knee stretches considerably when you bend it, and tape applied to a straight leg will either tear away or pinch the moment you sit.
Once each strip is down, rub it briskly for a few seconds. Friction warms the adhesive and helps it bond. Then wait before you exercise; putting tape on at home rather than at the trailhead is the simplest way to give it a chance.
Method 1: rigid patellar taping for pain at the front of the knee
This is the technique with the longest research record, often called McConnell taping after the physiotherapist who described it. The aim is to draw the kneecap gently toward the inside of the knee and to give the thigh muscles a clearer sense of where the joint is.
You will need soft underwrap and rigid strapping tape. Sit with the leg out in front, knee bent only slightly, thigh muscles relaxed.
- Step 1. Lay a strip of underwrap across the front of the kneecap from the outer edge to the inner edge, no tension. This protects the skin.
- Step 2. Cut a strip of rigid tape long enough to reach from the outer border of the kneecap to the inner side of the knee, finishing over the soft tissue rather than on the bony point.
- Step 3. Anchor the tape on the outer border of the patella. With the thumb of your free hand, push the kneecap gently toward the inside of the knee.
- Step 4. While holding that position, pull the tape across the front of the kneecap and secure it on the inner side. Use the fingers of your anchoring hand to gather the soft tissue on the inner knee toward the kneecap before the tape lands, so the skin is not dragged flat.
- Step 5. Test it immediately. Step down from a low step or perform a shallow squat. The movement that hurt should hurt noticeably less. If it does not, peel it off and reapply with a slightly different angle or firmer glide.
That test is the heart of the method. Rigid taping is meant to be adjusted until a specific movement improves, not applied by rote and hoped for. If two or three attempts change nothing, this technique is not addressing your particular knee, and a physiotherapist can tell you why.
Method 2: elastic taping for general support and runner's knee
This is the application most people picture when they think of taping a knee: two strips cradling the kneecap in a teardrop. It offers no mechanical control of the joint; what it provides is a gentle, constant sensory cue that many people find comforting during running, squatting and stairs.
Sit in a chair with the knee bent to a right angle, foot flat on the floor.
- Step 1. Measure two strips from about a hand’s width above the kneecap to a hand’s width below it. Round the corners.
- Step 2. Tear the backing paper a short distance from one end of the first strip. Stick this end, with no stretch at all, on the shin just below and to the inner side of the kneecap.
- Step 3. Peel the backing as you go and lay the tape up the inner border of the kneecap with a light stretch, roughly the pull you would use to smooth a bedsheet. Finish above the kneecap on the thigh with the last section again completely unstretched.
- Step 4. Repeat with the second strip on the outer side, so the two strips meet or nearly meet above and below, framing the kneecap.
- Step 5. Optional: a shorter horizontal strip across the tendon just below the kneecap. Apply light-to-moderate stretch only to the middle section over the tendon, with unstretched ends.
- Step 6. Rub every strip to warm the adhesive.
The anchors must be unstretched. A stretched end has nothing to grip and lifts within an hour, taking the rest of the strip with it. Mayo Clinic notes that patellofemoral pain typically worsens with running, stairs, squatting and prolonged sitting; if the taped knee feels no different during those specific activities, the tape is decoration, and your attention is better spent on the exercise program that addresses the underlying cause.
Method 3: side support for the inner or outer knee
Pain along the inner or outer side of the knee, often after a twist, a slip on wet ground or a tackle, points toward the collateral ligaments or the meniscus rather than the kneecap. Taping here has a different job: to give the knee a sense of a boundary when it moves sideways.
Stand or sit with the knee slightly bent and the foot flat.
- Step 1. Locate the joint line on the painful side by sliding your thumb down beside the kneecap until it drops into the groove.
- Step 2. Apply a vertical strip that spans the joint line, from a hand’s width above it on the thigh to a hand’s width below it on the shin, keeping the strip on the side of the leg rather than wandering to the front or back.
- Step 3. Add two diagonal strips that cross over the joint line to form an X, each starting on the thigh and ending on the shin.
- Step 4. With elastic tape, use light stretch in the middle and none at the ends. With rigid tape, apply over underwrap with the knee held in a comfortable, slightly bent position, and pull only firmly enough to feel a gentle check when the knee is pushed inward or outward.
The honest limitation: tape cannot stop a knee from buckling if a ligament is genuinely torn. NHS guidance on sprains and strains says most feel better after around two weeks, but that you should avoid strenuous exercise, including running and sport, for up to eight weeks to reduce the risk of further damage. A knee that gives way under you is a knee that needs assessment, not tape.
How to tape a knee for meniscus pain, and what tape can't do
People search this question hoping tape can hold a torn meniscus in place. It cannot, and understanding why saves disappointment.
The menisci are two C-shaped wedges of cartilage that sit deep inside the joint, between the thigh bone and the shin bone. Tape sits on the skin, separated from them by muscle, tendon, fat and the joint capsule. Nothing applied to the surface can reposition or splint a structure that deep. Mayo Clinic describes a torn meniscus as commonly causing swelling, stiffness, pain on twisting, difficulty straightening the knee fully, and a sensation of the knee locking or catching. Tape changes none of those mechanics.
What taping can offer is comfort. The side-support method described above, applied over the painful joint line, may reduce the sense of instability and ease surface discomfort enough to let you walk more normally. Some people also find the elastic teardrop around the kneecap helps because meniscal irritation often produces a generally sore, swollen knee that appreciates any sensory input.
Use it as a bridge, not a fix. Mayo Clinic notes that many meniscal tears, particularly degenerative ones, improve with rest, ice, activity modification and physical therapy, while others need surgical assessment. The deciding factor is often the pattern of symptoms, which is why anyone whose knee locks, cannot fully straighten, or swells rapidly after a twisting injury should see a doctor rather than reach for tape.
One more caution: because tape can make a knee feel better than it is, it can tempt you back onto a football pitch or a trail before the joint is ready. If tape is the only thing that makes an activity possible, that activity is probably not right for your knee yet.
Can I tape my knee by myself?
Yes, and the knee is one of the easier joints to reach. You can see it, you can bend it to the right angle in a chair, and both hands are free. The catch is that the methods differ in how much they forgive a wobble.
Elastic taping is genuinely doable alone from the first attempt. Sit on the floor with your back against a wall and the leg bent, or in a firm chair with the foot flat. Pre-cut and pre-round every strip, tear the backing paper before you start, and keep a mirror or a phone camera propped where you can glance at the kneecap from the front. Mistakes tend to be cosmetic rather than harmful: a strip slightly off-center still delivers skin stimulation.
Rigid patellar taping is harder solo because you are doing three things at once: pushing the kneecap with one thumb, gathering the inner skin with fingers, and pulling tape with the other hand. It becomes much easier if you rest the leg on a rolled towel so the knee is slightly bent and the thigh relaxed, and if you practice the glide-and-pull once without tape to find the rhythm. The built-in test, does the painful step now hurt less, tells you whether you got it right.
A few situations call for help. If your skin reacts to adhesives, a physiotherapist can suggest alternatives. If you cannot reproduce pain relief after several attempts, you may be taping for the wrong problem. And if this is a fresh injury with swelling, MedlinePlus advises rest, ice, compression and elevation as first steps, alongside a proper assessment, rather than experimenting with strapping at home.
Taping for sport: timing, sweat and what to expect on the day
Tape behaves differently under the conditions of sport, so a few adjustments make the difference between an application that lasts a match and one that peels at the first water break.
Apply it at home, not in the car park. Adhesive needs time and body warmth to bond, and a strip that has been on for a while before you start sweating stays put far better than one applied minutes before kickoff. Dry skin matters more than ever here, so tape before you warm up rather than after.
Expect the sensation to change once you move. Elastic tape that felt snug in the chair will feel almost absent during a run; that is normal, and it is one reason the research finds the benefit is largely about awareness rather than mechanics. Rigid tape, by contrast, may feel restrictive at first and then settle.
For contact and cutting sports, side-support strips tend to be more relevant than the kneecap teardrop, because the loads are sideways. Reapply between sessions rather than trying to stretch one application across a weekend tournament. Wet, rolled or lifting tape offers nothing except a rash.
Tape is not clearance to play. NHS guidance after a sprain or strain recommends avoiding strenuous exercise for up to eight weeks, and returning to sport gradually as pain allows. Taping a knee so you can push through pain that would otherwise stop you defeats the purpose of pain, which is information. Use it to move more comfortably within the limits your clinician or physiotherapist has set, and pay attention to any new swelling, warmth or giving way afterward.
How to remove knee tape without taking your skin with it
The final step is the one nobody films, and it is where most skin damage happens. A strip ripped off like a bandage takes the top layer of skin cells with it, leaving a raw, stinging outline that then cannot be taped for days.
Soften first. A warm shower loosens the adhesive of most elastic tapes, and a little baby oil, olive oil or a dedicated adhesive remover massaged into the edges works even better, especially for rigid tape. Give it a minute or two to soak in.
Remove in the direction of hair growth, which on the thigh and shin usually means peeling downward toward the foot. Rather than pulling the tape away from the leg, press the skin down with the fingers of one hand just ahead of the edge and roll the tape back on itself, slowly, keeping it close to the skin. The motion is more like folding than lifting.
If the tape has been on for several days, the edges may have gathered fluff and sweat; that is not a problem, but the adhesive underneath will be more stubborn, so take your time.
Once the tape is off, wash the area, dry it and apply a plain moisturizer. Check the skin. Mild pink marks that fade within a few hours are normal. A raised, itchy, well-defined red rectangle matching the tape’s outline suggests contact irritation or allergy, and the area should be left untaped until it is fully calm. Blistering, weeping or spreading redness is a reason to see a doctor or pharmacist rather than to try a different brand.
The mistakes that make knee taping fail
Taping is simple in principle and easy to get subtly wrong. These are the errors physiotherapists see most often, and each has a simple fix.
Stretching the anchors. The ends of elastic tape must be laid down with zero tension. A stretched anchor is under constant recoil and lifts within the hour. Fix: tear the backing so that the first and last sections are applied straight off the paper with no pull.
Taping a straight leg. Skin over the knee lengthens dramatically when you bend. Tape applied straight either tears away or drags the skin painfully when you sit. Fix: bend the knee to the position the method calls for before any tape touches the leg.
Using elastic tape for a job that needs rigid tape. No amount of colorful tape will move a kneecap. If your goal is to shift or limit, use rigid tape over underwrap.
Wrapping in a full circle. A continuous ring around the thigh or shin restricts blood flow and swells the leg below it. Fix: every strip should have a beginning and an end that do not meet.
Skipping the test. Rigid patellar taping is meant to be adjusted until a painful movement improves. Applying it once and living with the result wastes the technique.
Taping over broken or irritated skin, or immediately after shaving. Fix: wait until skin is intact and calm.
Expecting tape to substitute for rehabilitation. This is the biggest one. The evidence for taping is for short-term comfort; the evidence for strengthening the hip and thigh in patellofemoral pain is for lasting improvement. Tape that helps you do your exercises is doing its job. Tape that replaces them is not.
When to see a doctor about knee pain
Taping suits knees that are sore, stiff or nagging. Some knees need a clinician first, and tape can mask the signals that would otherwise prompt you to seek help.
Seek care urgently, the same day, if you cannot put weight on the leg, the knee is visibly deformed or has shifted, you heard a loud pop with immediate large swelling, the knee is locked and will not bend or straighten, or you have numbness, tingling or a cold, pale foot below the injury. Seek urgent care too if the knee is hot, red and swollen and you feel feverish or generally unwell; a joint infection cannot be managed at home. These red-flag signs align with NHS guidance on knee pain, which advises urgent assessment for a knee that is very painful, locks or gives way, or cannot bear weight.
Book a non-urgent appointment if pain has not improved after treating it at home for a few weeks, in line with NHS advice; if swelling keeps returning; if the knee repeatedly catches or feels unstable during everyday walking; if pain wakes you at night; or if you have a history of cancer, take medicines that affect immunity, or have unexplained weight loss alongside joint pain.
For a fresh, minor injury, MedlinePlus and Mayo Clinic both describe first aid as rest, ice for 15 to 20 minutes at a time, gentle compression and elevation. Mayo Clinic adds that a doctor should be seen if a sprain prevents you from walking a few steps without significant pain or if the joint feels numb.
Children and teenagers with knee pain, and anyone whose knee pain began without any obvious injury, benefit from an assessment before beginning a taping routine, because the causes in those groups differ from the sports-injury pattern most taping guides assume.
What matters more than the tape
If you remember one thing from this guide, make it this: tape is the least important item in a good knee plan, and the most visible. That combination is exactly why it gets so much attention and why it deserves a clear-eyed place in the order of priorities.
First comes understanding what is wrong. Pain at the front of the knee behaves differently from pain along the joint line, which behaves differently from a knee that swells after twisting. Mayo Clinic’s description of patellofemoral pain, aggravated by stairs, squatting and sitting, is a useful self-check; if your pattern is different, the front-of-knee methods may be aimed at the wrong target.
Second comes load. Almost every overuse knee problem has a story of doing more, sooner, than the tissues were ready for. Adjusting distance, hills, frequency or footwear does more than any strip of adhesive.
Third comes strength and control, particularly of the hip and thigh muscles that steer the knee. This is where the durable evidence lives. It is slow, unglamorous and it works.
Then, and only then, comes tape: a way to make the first two weeks of that program tolerable, to give a nervous knee a sense of company on a run, or to get through a match that matters while a longer plan takes effect.
Used that way, taping is a genuinely helpful piece of self-care with a plausible mechanism and modest, honest evidence behind it. Used as a substitute for assessment, rest and strengthening, it becomes a colorful way of ignoring a knee that is trying to tell you something. Your knee is worth the less photogenic approach.
Frequently asked questions
Will taping my knee help knee pain?
It may reduce pain modestly and briefly, particularly for pain at the front of the knee. Studies show many people feel less discomfort right after rigid patellar tape is applied, but the effect fades when the tape comes off, and elastic tape often performs no better than a placebo application. Taping works best as a comfort aid that lets you keep moving and doing rehabilitation exercises, not as a stand-alone treatment.
Can I tape my knee by myself?
Yes. The knee is easy to reach and see, and elastic taping is forgiving enough to succeed on a first attempt if you pre-cut the strips, bend the knee to a right angle and keep the anchors unstretched. Rigid patellar taping is harder alone because you push the kneecap and pull tape at the same time, but resting the leg on a rolled towel and practicing the motion once without tape makes it manageable.
How do I tape a knee for a meniscus problem?
Use the side-support method: a vertical strip spanning the painful joint line with an X of two diagonal strips over it, applied with the knee slightly bent. This may ease surface discomfort and a sense of instability. It cannot hold or heal the meniscus, which lies deep inside the joint. If the knee locks, cannot fully straighten or swells rapidly after twisting, see a doctor before relying on tape.
Where should I tape my knee?
It depends on where it hurts. For pain at the front, tape runs across or around the kneecap, from its outer border toward the inner knee for rigid tape, or from the shin bump up both sides of the kneecap for elastic tape. For pain at the inner or outer side, strips span the joint line, the horizontal groove you feel beside the kneecap when the knee is slightly bent. Never wrap fully around the leg.
Should I use rigid tape or kinesiology tape for my knee?
Choose rigid tape if your goal is to shift the kneecap or limit sideways movement, because it does not stretch; apply it over underwrap to protect the skin. Choose elastic kinesiology tape if you want gentle support, skin stimulation and comfort during sport, and if you are applying it yourself for the first time. Elastic tape is kinder to skin but cannot hold anything in place.
How tight should knee tape be?
Elastic tape should be applied with light stretch in the middle, about the pull you would use to smooth a bedsheet, and no stretch at all at the ends. Rigid tape is pulled only firmly enough to change the painful movement when you test it. Any tape that causes throbbing, numbness, tingling, or a cool or discolored foot is too tight and should come off immediately.
Can I exercise or run with my knee taped?
You can, provided the activity is one your knee is otherwise ready for. Apply the tape at home on clean, dry skin so it bonds before you sweat, and expect elastic tape to feel almost absent once you are moving. Tape should not be used to push through pain that would otherwise stop you; after a sprain or strain, NHS guidance advises avoiding strenuous exercise for up to eight weeks.
How do I remove knee tape safely?
Soften the adhesive first with a warm shower or a little oil rubbed into the edges, then peel in the direction of hair growth, usually downward toward the foot. Press the skin down with one hand just ahead of the edge and roll the tape back on itself slowly rather than lifting it away. Wash and moisturize afterward, and leave the skin untaped if it shows a raised, itchy red outline.
What are the risks of taping a knee?
The main risks are skin irritation, allergic reaction to the adhesive, and blistering or skin tears from careless removal. Wrapping tape fully around the leg can restrict circulation. A subtler risk is false confidence: tape can make an injured knee feel better than it is and tempt an early return to sport. Test a small patch on your forearm first and stop using any tape that causes burning or a rash.
When should I see a doctor instead of taping my knee?
See a doctor urgently if you cannot bear weight, the knee is deformed, locked or gave way with a loud pop and rapid swelling, your foot is numb or cold, or the knee is hot, red and swollen with fever. Book a routine appointment if pain has not improved after a few weeks of home care, swelling keeps returning, the knee catches during everyday walking, or pain wakes you at night.
References
This article is for general information only and is not a substitute for professional medical advice. Please consult a qualified doctor about your individual situation.

More from the Blog

Before Your First Vestibular Rehabilitation Visit: Symptom Diary, Hearing Tests and Medicines
Before a vestibular rehabilitation first appointment, most teams ask for three things: a short symptom diary recording when dizziness happens, how long it lasts…

Skin Checks and Pressure Relief After Spinal Cord Injury Rehabilitation: A Daily Routine
Pressure sore prevention after spinal cord injury rests on a daily routine: inspect skin over bony areas at least once or twice a day,…
What a Pulmonary Rehabilitation Session Involves: Exercise, Breathing Training and Education
Pulmonary rehabilitation is a supervised program for people with chronic lung disease that combines exercise training, breathing techniques and education. A typical session includes…

Daily Life After Vision Rehabilitation: Practicing Contrast Strategies and Orientation Skills
Living with low vision after rehabilitation works best when contrast and orientation skills become daily habits: use dark-on-light or light-on-dark pairings for food, stairs,…

Shockwave Therapy for Plantar Fasciitis: What the Trials Show
Shockwave therapy shows moderate evidence of benefit for chronic plantar fasciitis. Randomized trials and meta-analyses find it relieves heel pain better than sham treatment…

Inside a Bobath Treatment Session: Guided Handling, Positioning and Task Practice
A Bobath therapy session is a hands-on neurological rehabilitation appointment, usually with a physiotherapist or occupational therapist, in which the therapist guides your movement,…