

How a Prosthetic Limb Is Designed and Fitted: Casting, Gait Analysis and Adjustments
Key Takeaways
- The socket, the cup that grips the residual limb, determines comfort and function far more than the sophistication of the knee or foot below it.
- A clear thermoplastic test socket lets the prosthetist watch skin blanch and redden under load, catching pressure problems before the durable limb is built.
- Most people are fitted with a preparatory training prosthesis first and a definitive limb months later, once the residual limb has stopped shrinking quickly.
- Prosthetic legs stay on through suspension systems such as pin locks, suction valves, vacuum pumps, sleeves or anatomical shaping, usually combined with a soft liner.
- Residual limb volume changes across a single day and across months, which is why sock plies and repeated socket adjustments are routine rather than a sign of failure.
- A red mark that persists, blisters, or breaks the skin after removing the prosthesis is a reason to stop wearing it and call the team, not something to push through.
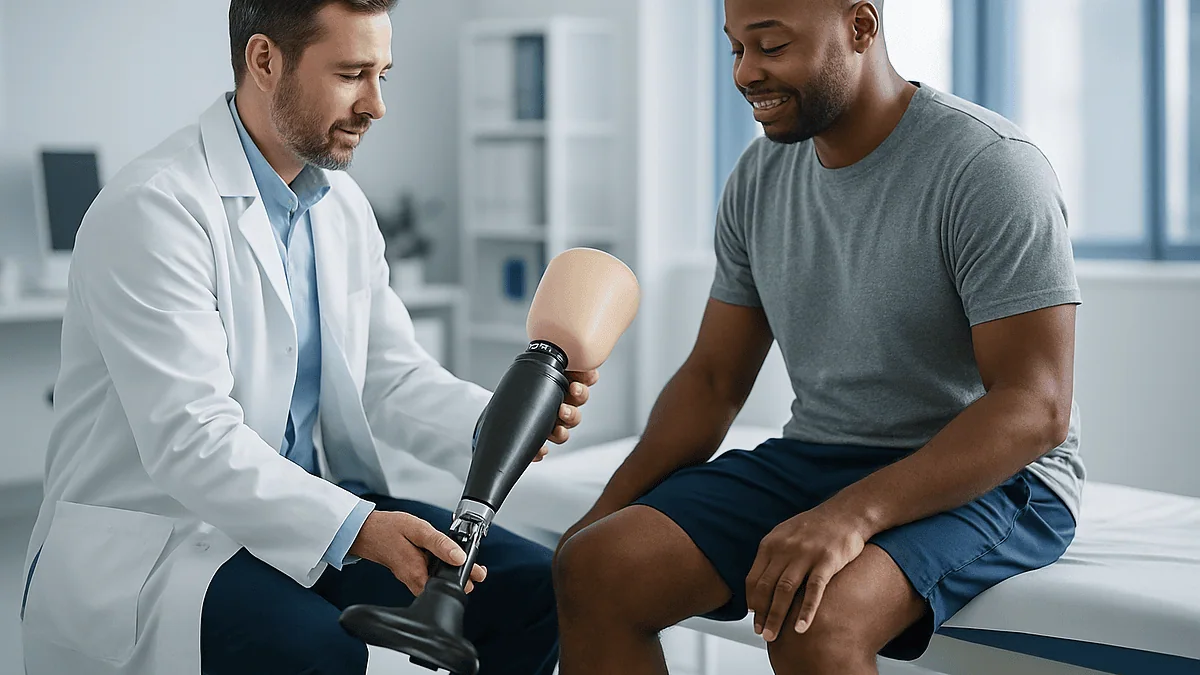
The prosthetic fitting process usually begins once the surgical wound has healed and swelling has settled. A prosthetist captures the shape of the residual limb by casting or 3D scanning, builds a clear test socket, checks it under load, then assembles a preparatory limb. Physical therapists analyze how you stand and walk, and the socket is adjusted repeatedly as the limb changes shape over the following months.
The first thing many people notice in the prosthetist’s workshop is the smell: warm plaster, a hint of resin, the faint burnt-sugar scent of thermoplastic being heated. The second thing is how ordinary the tools look. Tape measures. Marker pens. A heat gun that would not look out of place in a garage. For someone weeks out from an amputation, that ordinariness can be oddly steadying.
The prosthetic fitting process is less a single appointment than a conversation carried on over months, with the limb itself changing its mind halfway through. A socket that felt right on a Tuesday can feel loose by Friday, not because anything went wrong but because a healing limb shrinks, swells and reshapes itself daily.
What follows is an honest walk through that process: casting, test sockets, gait analysis and the long tail of adjustments. Not a promise of how it will go for you, but a clear picture of what the people in that workshop are actually doing, and why.
What happens in the prosthetic fitting process, step by step
Strip away the jargon and the prosthetic fitting process has five recognizable stages, each with a purpose you can see with your own eyes.
First comes preparation. The residual limb, the clinical term for the part of the limb that remains after amputation, is compressed with an elastic shrinker sock so that swelling drains and the tissue settles into a stable, roughly conical shape. MedlinePlus discharge guidance describes this shaping phase as a routine part of recovery before any socket is made.
Second is shape capture. A prosthetist, the clinician who designs and builds artificial limbs, either wraps the limb in plaster bandage to make a negative mold or records it with a handheld optical scanner. Either way, the goal is a precise digital or physical copy.
Third is the test socket. From that copy the prosthetist makes a clear plastic socket, the cup that the limb sits in, and attaches it to a temporary pylon and foot. You stand and take steps while the team watches skin color and pressure marks through the plastic.
Fourth is the preparatory prosthesis. Once the test socket fits well, a sturdier version is built for daily training, and physical therapy begins in earnest with balance work and gait analysis.
Fifth, months later, comes the definitive prosthesis, the longer-term limb made once the residual limb has stopped changing shape quickly. Even this is not final in the strict sense; sockets are replaced periodically over a lifetime as bodies change. The NHS notes that the whole pathway is supervised by a rehabilitation team rather than a single clinician, which matters because the fitting decisions and the therapy decisions constantly feed each other.
Who is usually fitted first, and who is usually asked to wait
Not everyone who has an amputation is fitted with a prosthesis immediately, and some people are advised against one altogether. That is a clinical judgment, not a verdict on effort or worth.
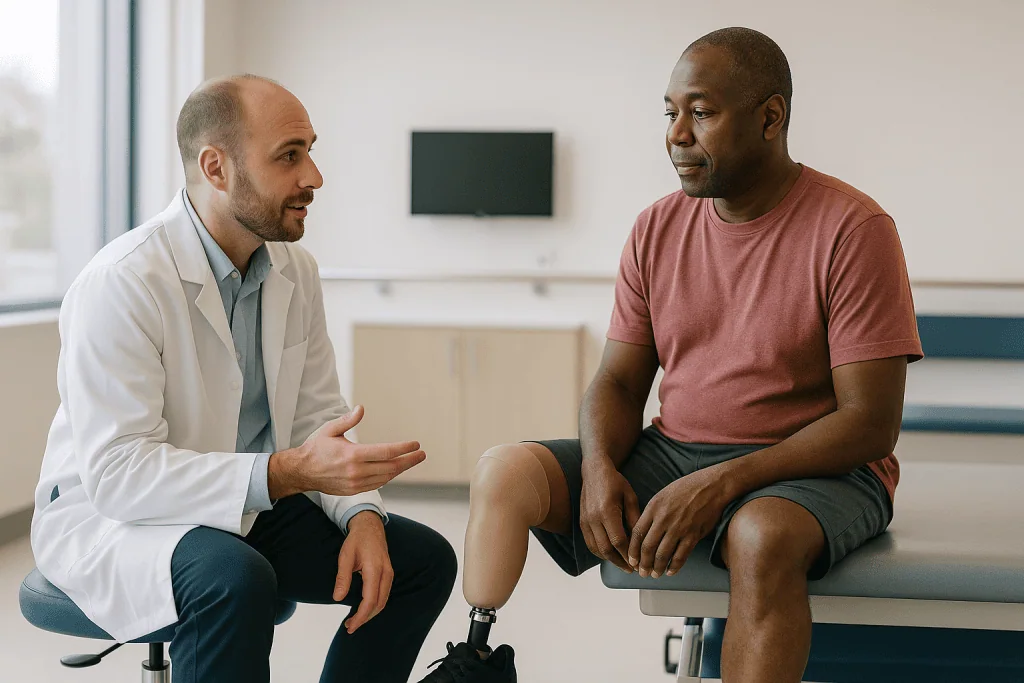
People who tend to move quickly toward fitting share a few features. Their surgical wound has closed without infection. Their residual limb has enough soft tissue padding over the bone to tolerate pressure. They have the cardiovascular reserve to manage the extra work of walking on a prosthesis, which is considerably higher than walking on two intact legs, especially for above-knee amputations. The NHS describes an assessment by the rehabilitation team that weighs exactly these factors before a prosthesis is offered.
Others are usually asked to wait. A wound that is slow to heal, particularly in people with diabetes or peripheral arterial disease, cannot safely bear load. Persistent swelling means any socket cast now would be the wrong size within weeks. Joint contractures, where a hip or knee has stiffened into a bent position from prolonged sitting, need to be addressed in therapy first, because a socket cannot correct a joint that will not straighten. MedlinePlus lists contracture prevention, through positioning and stretching, as a core early task after leg amputation for this reason.
A smaller group may be advised that a prosthesis is not the right goal. Someone with severe heart failure, advanced dementia or very limited pre-operative mobility may find a wheelchair offers more independence with less risk. Johns Hopkins describes rehabilitation goals as individualized, set with the person and their family rather than assumed.
The honest framing is that timing is protective. Fitting too early risks skin breakdown and a socket that is obsolete before it is paid attention to. Waiting, uncomfortable as it feels, usually produces a better first fit.
Getting the residual limb ready: shrinkers, shaping and skin
Before anyone reaches for plaster, the limb itself needs to be ready, and most of that work happens at home.
The shrinker sock is the workhorse. It is an elastic compression garment, tighter at the bottom than the top, that pushes fluid up and out of the limb toward the body. MedlinePlus advises wearing it as directed by the care team to control swelling and shape the limb for a prosthesis. Some centers use elastic bandaging instead, wrapped in a figure-of-eight pattern with the firmest pressure at the end of the limb; the technique is taught rather than improvised, because uneven wrapping can create a bulbous end that is very hard to fit.
Shape matters because of physics. A socket holds a limb by distributing load across its surface, and a cylindrical or gently tapered limb spreads that load far more evenly than a limb that is narrower at the top than the bottom. Weeks of consistent compression do more for the eventual fit than any clever socket design.
Skin is the other preparation project. The scar and surrounding tissue are often exquisitely sensitive at first. Therapists commonly teach desensitization: gently rubbing the area with progressively rougher fabrics, tapping it, and massaging the scar to keep it from adhering to deeper tissue. A scar stuck to bone tends to tear under the shear of walking.
Muscle strength and joint range come into this as well. Lying face down for periods each day keeps the hip from tightening into flexion after an above-knee amputation. Straightening the knee fully, repeatedly, does the same for below-knee limbs. Johns Hopkins describes this early conditioning as part of pre-prosthetic rehabilitation, and prosthetists will confirm that a strong, mobile limb is far easier to fit than a stiff, swollen one, however skilled the casting.
Casting and 3D scanning: capturing the shape of the limb
Shape capture is the moment the prosthetic fitting process becomes physical, and there are two main ways to do it.
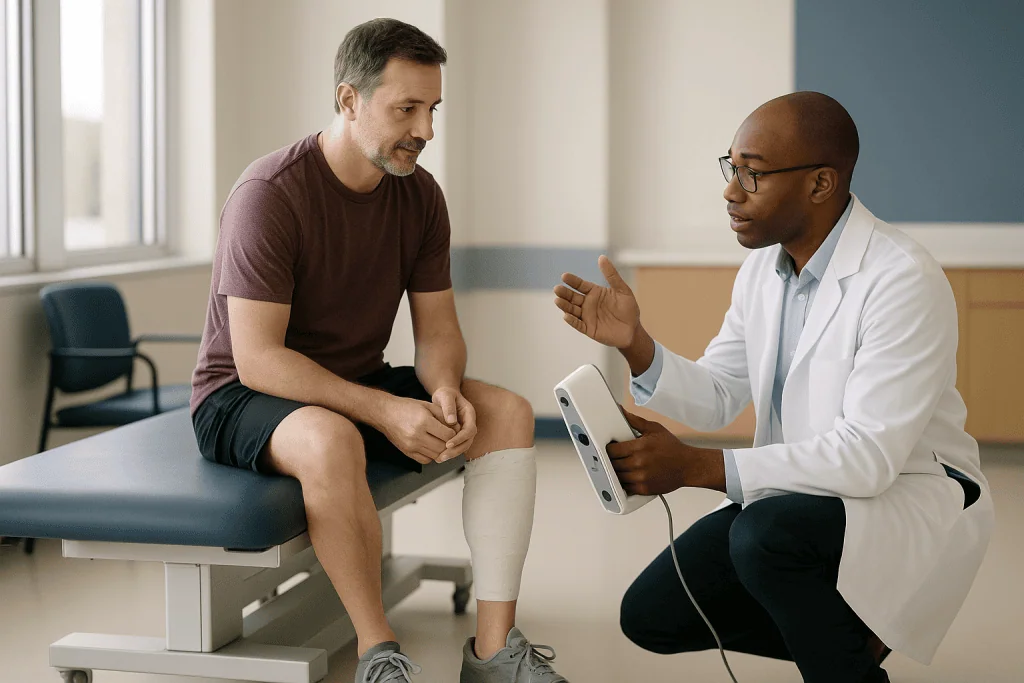
Traditional casting starts with a thin nylon or cotton sleeve pulled over the limb. The prosthetist marks landmarks in indelible pencil: the bony end of the tibia, the head of the fibula, the patellar tendon, any tender or scarred spots. These transfer to the plaster so the workshop knows where to add relief and where to add pressure. Warm plaster bandages are then wrapped around the limb, and while they set, the prosthetist’s hands press deliberately into specific areas. Below the kneecap, for example, a firm indentation shapes a shelf that will later carry body weight on the patellar tendon, a structure that tolerates load well, while relieving the sharp end of the shin bone, which does not. This handwork is the part that separates a good socket from a merely accurate one.
The negative cast is removed, filled with plaster to make a positive model, and that model is modified by hand: material shaved away where pressure is wanted, added where relief is wanted.
Optical 3D scanning replaces the plaster with a handheld device that records the limb’s surface as a digital mesh. The same landmark marks are made, the same modifications are applied, but on screen, and the modified model is carved by machine from a foam block or printed. Scanning is cleaner and repeatable, and it records the unloaded shape faithfully, but it captures less information about how the tissue behaves under a pressing hand, so many prosthetists still palpate and note tissue firmness alongside the scan.
Neither method is inherently better. What matters is the prosthetist’s understanding of where your limb can carry load, and the follow-up in the test socket that checks that understanding against reality.
The clear test socket: why your first socket is see-through
The first socket you stand in will probably be transparent, and that is by design rather than economy.
A test socket, sometimes called a check socket or diagnostic socket, is a clear thermoplastic shell molded over the positive model. Through it, the prosthetist can watch what is happening to your skin while you bear weight. Healthy loaded tissue blanches evenly and pinks up again when unloaded. A patch that stays white too long is being crushed. A patch that stays red is being rubbed. Air gaps show as spaces where skin is not touching plastic at all. None of this is visible in a finished carbon-fiber socket, so the transparent stage catches problems while they are still cheap to fix.
The appointment itself is unglamorous. You stand in parallel bars with the test socket attached to an adjustable pylon, the metal tube that stands in for the shin, and a basic foot. The prosthetist checks the height, the alignment of the socket over the foot, and how your pelvis sits. You shift weight, then take steps. You describe exactly where you feel pressure, and the prosthetist marks those spots on the outside of the plastic with a pen.
Modifications follow on the spot. A heat gun softens a tight area so it can be pushed outward a few millimeters. A strip of foam padding tests whether adding pressure elsewhere helps. Sometimes the socket is cut, spread and re-molded. It is common for a test socket to be reheated and reshaped several times in a single session, and for a second test socket to be made if the first reveals that the underlying model was wrong.
Only when both you and the prosthetist agree that the socket is comfortable under load, in standing and stepping, does the shape move forward to a preparatory limb. Rushing this stage is the single most common reason early prostheses hurt.
How do prosthetic legs stay on? Suspension and liners explained
People searching how fake legs stay on are asking one of the most important questions in prosthetics, because a socket that shifts even slightly with every step will rub skin raw. The engineering answer is called suspension, and there are several approaches.
Most modern lower-limb systems start with a liner: a soft sleeve of silicone, gel or similar polymer that is rolled directly onto the skin like a thick stocking. It cushions, reduces friction, and gives the socket something uniform to grip. The suspension method then determines how liner and socket lock together.
Pin locking uses a short metal pin at the bottom of the liner that clicks into a ratcheting lock in the socket floor. You hear it engage step by step as you push in; a button releases it. It is simple and reliable but concentrates pull at the very end of the limb when the leg swings forward.
Suction uses a one-way valve. As the limb enters, air is expelled; when the limb tries to pull out, negative pressure resists it. Some systems add a small pump, powered by the movement of walking, that actively draws air out with each step, keeping the fit snug as the limb changes volume across the day.
Sleeve suspension rolls an outer neoprene or gel sleeve from the socket up onto the thigh, sealing the system and holding by friction and gentle vacuum.
Anatomical suspension, common in older or simpler designs, shapes the socket to grip above a bony landmark, such as the widened area just above the knee, so the bone itself holds the socket on. Straps and belts still have a place where skin cannot tolerate a liner.
Which suspension suits you depends on limb shape, skin condition, hand dexterity and activity. The prosthetist will usually explain the trade-offs and may let you try more than one on the test socket before deciding.
Choosing feet, knees and components: what activity level means
Once the socket is right, the rest of the limb is assembled from components, and the choice is guided less by what is newest than by how you actually intend to move.
Rehabilitation teams commonly grade expected function into broad activity levels, from someone who will mainly transfer from bed to chair, through household walking, community walking on uneven ground, up to running or heavy work. The grade is a prediction based on health, strength, balance and goals, and it can be revised upward as therapy progresses. It shapes component choice because a foot built to store and return energy for a jogger is heavier and stiffer than one designed to give a stable, forgiving base for someone walking short distances indoors.
| Component | What it does | Typical trade-off the team weighs |
|---|---|---|
| Solid-ankle cushioned-heel foot | Stable, simple foot with a soft heel that absorbs impact | Very predictable but returns little energy at push-off |
| Energy-storing carbon foot | Flexes under load and springs back to help propel the step | More responsive, but needs enough strength and balance to control it |
| Mechanical (friction or hydraulic) knee | Controls how fast the shin swings using friction or fluid resistance | Reliable and lighter; walking speed is set mechanically |
| Microprocessor knee | Sensors adjust resistance many times per second to match terrain and speed | Adapts to slopes and stumbles, but is heavier and needs charging |
| Torsion or shock-absorbing pylon | Allows slight rotation and vertical give between socket and foot | Eases stress on skin and joints; adds weight and length |
For above-knee prostheses, knee choice carries the most consequence, because the knee is what prevents a fall when the leg is loaded at the wrong moment. Below-knee prostheses skip that decision entirely, which is one reason rehabilitation after below-knee amputation is typically less demanding.
No component is right in the abstract. A heavier, more capable knee can be a burden for someone whose priority is safe, short walks, while an overly simple foot can hold back a person who wants to return to outdoor work. The conversation belongs with your prosthetist and therapist, who see how you move rather than how a specification sheet reads.
Prosthetic leg fitting stages: from preparatory to definitive limb
People often expect one prosthesis. In practice there are usually two, sometimes three, and understanding the prosthetic leg fitting stages saves a great deal of frustration.
The preparatory prosthesis, also called a temporary or training prosthesis, is built once the test socket passes. Its socket is often laminated or thermoformed but left plain, without a cosmetic cover, so that adjustments remain easy. The components are frequently basic. Its job is to let you start walking while your limb is still changing shape, and to teach the team how you move so the definitive limb can be specified intelligently. The NHS describes this early prosthesis being fitted once the wound has healed and swelling has reduced enough for a socket to hold a stable shape, typically in the weeks to months after surgery, with timing set by the rehabilitation team.
During this stage the limb keeps shrinking. That is expected. Fluid that accumulated after surgery continues to drain, and muscles that no longer cross a joint gradually lose bulk. You manage the change day to day with prosthetic socks of varying thickness, adding plies as the limb gets smaller, and the prosthetist manages it with padding and reshaping at appointments.
The definitive prosthesis is made when the limb’s volume has become reasonably steady across several visits. Its socket is usually cast or scanned afresh rather than copied from the old one, because months of walking will have changed both the limb and your tolerance for load. Components are chosen with the benefit of real gait data from the training period. A cosmetic cover may be added if you want one, though many people prefer the exposed structure.
Even the definitive limb is periodic rather than permanent. Weight change, aging, new medical conditions and ordinary wear mean sockets are replaced over the years. Thinking of the prosthesis as something maintained, like eyeglasses or dental work, is closer to reality than thinking of it as something finished.
Gait analysis: what the team is watching when you walk
Gait analysis sounds like a laboratory procedure, and sometimes it is, with pressure-sensing walkways and motion-capture cameras. Most of the time it is a physical therapist and a prosthetist standing at the end of a corridor, watching you walk toward them and away, over and over, with an intensity that can feel unnerving.
What they are looking for follows the mechanics of a step. As the prosthetic heel strikes, does the foot roll smoothly onto the sole, or slap down? As body weight passes over the prosthesis, does the trunk stay level, or lurch sideways over the artificial leg? That lurch, often called a lateral trunk lean, usually means the socket is too wide, the hip muscles are weak, or the foot is set too far to the outside. At push-off, does the prosthetic leg swing through cleanly, or does the hip hitch upward to clear a foot that feels too long?
Each deviation points to a cause, and the cause may be alignment, socket fit, component settings or the person’s own strength and confidence. Alignment adjustments are made with small wrenches at the connectors between socket, pylon and foot: tilting the socket a few degrees forward or back, shifting the foot inward or outward, changing the height by a few millimeters. The effect on gait can be immediate and surprising. A foot moved slightly forward can make a knee feel far more stable; a socket tilted a degree or two can relieve pressure the wearer had assumed was permanent.
Therapists complement this with training. Weight-shifting drills in the parallel bars teach the nervous system to trust the prosthetic side. Step-over-step practice on stairs, turning in tight spaces, walking on grass and gravel, and falling and getting up safely all feature. Johns Hopkins describes gait training as central to rehabilitation after amputation, and the honest observation from clinics is that most of the improvement in the first months comes from the person, not the hardware.
Prosthetic socket adjustment: why the fit keeps changing
If there is one thing new wearers wish they had been told plainly, it is this: a prosthetic socket adjustment is not a sign of failure. It is the normal rhythm of wearing a limb.
The residual limb is living tissue, and its volume shifts on three timescales. Across a single day, standing and walking push fluid downward, so a limb is often larger in the morning and smaller by evening. Across weeks, especially in the first year, post-surgical swelling resolves and unused muscle slims, so the limb shrinks. Across years, weight gain or loss, changes in kidney or heart function, and simple aging alter shape again.
Daily changes are handled by you. Prosthetic socks come in graded thicknesses, and adding or removing a ply is the everyday tool for keeping the socket snug. A socket that feels loose, with the limb dropping deeper and the end of the bone bumping the floor of the socket, usually wants an extra ply. A socket that feels tight, with pressure on the kneecap or thigh and a sense of being pushed out, usually wants one removed. Some people keep a small bag of socks with them for exactly this reason.
Weekly and monthly changes are handled at the clinic. The prosthetist can heat and reshape thermoplastic sockets, add or remove pads, adjust liner thickness, or modify the socket trim lines, the edges where the socket ends. When sock use climbs past a certain point, commonly several plies at once, it usually signals that the socket itself needs to be remade rather than padded further.
Skin is the referee. A red mark that fades within a short while after removing the limb is typically acceptable loading. A mark that persists, blisters, or breaks the skin is not, and MedlinePlus advises checking the residual limb daily for exactly these signs. Report them rather than pushing through; a small adjustment now prevents a wound that could keep you out of the prosthesis for weeks.
What the first weeks with a prosthesis usually look like
The first weeks are a wearing schedule, a therapy schedule and a skin schedule running in parallel, and the pace is deliberately slower than most people want.
Wearing time builds gradually. Teams typically start with short periods in the prosthesis, followed by removing it and inspecting the skin, then increasing the time in steps as the skin proves it can tolerate load. The exact progression is set by your prosthetist and therapist, because skin condition, circulation and sensation vary enormously between individuals. Someone with intact sensation will feel a hot spot developing; someone with diabetic neuropathy may not, and needs a more cautious, inspection-driven schedule.
Therapy sessions in this period focus on foundations. Standing balance in the parallel bars. Shifting weight fully onto the prosthetic side and holding it. Stepping forward and back with the intact leg while the prosthesis bears weight. Then walking with a walker or two crutches, progressing to one crutch or a cane as balance allows. The NHS describes this graded progression under physiotherapy supervision as the standard early pathway.
Fatigue is real and often underestimated. Walking on a prosthesis costs more energy than walking on two legs, and above-knee walking costs more than below-knee. New wearers frequently describe being surprised at how tired a short walk leaves them. That improves with conditioning, but it is a reason to plan rest into early days.
Phantom sensations, the feeling that the missing limb is still present, and phantom pain, discomfort felt in the absent part, are common in this period. Mayo Clinic notes that for many people these ease over time, and that the rehabilitation team has a range of approaches, from mirror therapy to medication classes prescribed by a physician, to help manage them. Report them; they are treated as part of rehabilitation, not a distraction from it.
Home practice matters as much as clinic time. Skin checks morning and night, shrinker wear when the prosthesis is off, and the stretching program to keep joints straight are the unglamorous work that determines how the following months go.
How long does it take to adjust to a prosthetic leg?
This is the question everyone asks, and the honest answer is that adjustment happens in layers, each on its own timescale, and none of them can be promised.
Physical tolerance comes first. Skin adapts to pressure and shear over weeks of gradual wear, much as feet adapt to new boots, though more slowly and with more at stake. Wearing time usually climbs from short sessions to most of the waking day over this period, at a rate the team sets.
Walking competence comes next. Moving safely with a walker indoors is one milestone; walking with a single cane, then unaided, on flat ground is another; managing curbs, slopes, stairs and uneven ground is a further step. The NHS and Johns Hopkins both describe rehabilitation as continuing for months after fitting, with the pace shaped by the level of amputation, general health, age and the reason for the surgery. People who lose a leg to trauma in their twenties and people who lose one to vascular disease in their seventies follow genuinely different curves, and comparing them is unhelpful.
Then there is the definitive limb. Because the residual limb continues to change shape through much of the first year, the definitive socket is typically not made until volume has stabilized, so the prosthesis you finish the first year in is usually not the one you started with.
The final layer is psychological, and it is the least predictable. Trusting the prosthesis enough to stop watching the ground, to carry a bag, to walk into a crowd, or to forget for stretches of the day that you are wearing it: this arrives unevenly, with good weeks and setbacks. Many people describe a point when the limb shifts from being equipment to being simply how they walk. When that happens varies too widely to put a number on, and clinicians who claim otherwise are guessing. What the evidence supports is that consistent therapy attendance, early reporting of fit problems, and realistic goal-setting with the team are associated with better functional outcomes than any specific component.
What people often get wrong about prosthetic fitting
Myths cluster around prosthetics, partly because the limbs seen in films and sports coverage are the exceptional cases. A few corrections are worth making plainly.
The first myth is that the technology is the hard part. It is not. The socket, the low-tech interface between skin and device, determines comfort and function far more than the sophistication of the knee or foot below it. An expertly fitted socket on a basic limb outperforms a poorly fitted socket on an advanced one, every time.
The second is that pain means you have to toughen up. Persistent pain in a socket is information, not initiation. A socket that hurts is usually loading the wrong tissue and needs adjusting. Pushing through can produce a pressure sore that takes weeks to heal, during which the prosthesis cannot be worn at all.
The third is that the first prosthesis is the prosthesis. As described above, the preparatory limb is a training tool, and the definitive limb follows months later, often with a fresh cast and different components. Judging the whole experience by the first fitting is like judging a house by the scaffolding.
The fourth is that a prosthesis restores the previous body. It restores function, sometimes a great deal of it, but walking costs more energy, sensation through the foot is absent, and uneven ground demands constant attention. Setting goals around what you want to be able to do, rather than around erasing the amputation, tends to serve people better.
The fifth, held mostly by family and friends, is that once fitted, the work is done. The follow-up appointments, the sock changes, the skin checks and the periodic socket replacements continue indefinitely. Support that anticipates this, rather than expecting a finish line, is more useful.
A last small one: yes, you can wear jeans with a prosthetic leg. Looser cuts pull on and off more easily over a knee unit and foot, and some people sew a zipper into an inner seam, but there is no rule against denim.
Questions to ask your care team
The prosthetic fitting process goes better when you arrive with questions, partly because the answers shape decisions and partly because asking signals to the team what you care about. These are the ones experienced wearers most often wish they had asked earlier.
- What does my residual limb need before casting, and what should I be doing at home to get it there?
- Are you planning to cast with plaster or scan digitally, and does either suit my limb better?
- Which suspension method are you considering for me, and what are the alternatives if my skin or hand strength does not tolerate it?
- What activity level are you predicting for me now, and what would change that prediction upward?
- How will I know the difference between normal break-in pressure and a fit problem that needs a call?
- How many plies of sock should prompt me to book an adjustment rather than keep adding layers?
- What is the plan for the definitive prosthesis, and roughly what signs will tell you my limb has stabilized enough to make it?
- Who do I contact between appointments if the socket is rubbing or a component feels loose, and how quickly can I usually be seen?
- What is the wearing schedule for the first weeks, and how should I adjust it if my skin reacts?
- How will phantom pain be managed if it develops, and who prescribes and follows up any medication?
- What footwear works with my foot component, and how does changing heel height affect alignment?
- Is there a peer support program or an experienced wearer I could speak with?
Write the answers down. Fitting appointments are dense, and people commonly leave having heard a great deal and retained little. It also helps to bring the shoes you actually intend to wear to every alignment appointment, since the prosthetic foot is aligned for a particular heel height and swapping to a different shoe afterward can quietly undo the work.
None of these questions has a single right answer. Their value is in surfacing your priorities so the team can weigh them alongside the clinical picture, which is where every fitting decision properly sits.
When to call your doctor
Most problems during prosthetic fitting are minor and fixable at the workshop. A few are not, and they should go to your physician or rehabilitation team promptly rather than waiting for the next scheduled visit.
Call the same day if the skin on your residual limb breaks open, blisters, or develops a red or dark area that has not faded well after removing the prosthesis. Do the same if there is new swelling, warmth, increasing pain, pus or an unpleasant smell from the surgical scar or any wound, or if you develop a fever alongside limb changes. MedlinePlus lists these as signs of possible infection after leg amputation that warrant contacting your care provider.
Seek urgent medical care if the limb turns pale, blue or cold, or if pain becomes sudden and severe, since these can indicate a problem with blood supply. Sudden calf pain and swelling in the other leg, chest pain or new shortness of breath also need emergency assessment, because people recovering from major surgery with reduced mobility carry a raised risk of blood clots.
Contact the team rather than an emergency service, but do not delay, if phantom pain becomes intense or begins to disrupt sleep and daily life, if you experience a fall or near-fall in the prosthesis, if a component feels loose or makes a new noise, or if your mood is low enough that you are struggling to engage with rehabilitation. Depression and anxiety after limb loss are common and treatable, and the NHS notes that psychological support is part of standard amputation care.
Above all, report early. A sore that is a quarter-inch across on Monday is an adjustment; the same sore left until Friday can become an ulcer that keeps you out of the prosthesis for weeks. Every decision about whether to keep wearing the limb, modify it, or pause while something heals belongs with the clinicians who can examine you, and the sooner they see a problem, the more options they have.
Frequently asked questions
How do fake legs stay on?
Prosthetic legs are held on by a suspension system, most often working with a soft silicone or gel liner rolled onto the skin. Common methods include a pin at the end of the liner that locks into the socket, a one-way suction valve, a vacuum pump driven by walking, an outer sleeve that seals over the thigh, or a socket shaped to grip above a bony landmark. Your prosthetist matches the method to your limb and skin.
How long does it take to adjust to a prosthetic leg?
It varies widely and cannot be promised. Skin tolerance builds over weeks of graded wear, safe walking with an aid usually develops over the following weeks to months, and rehabilitation continues well beyond fitting, according to NHS and Johns Hopkins guidance. Level of amputation, general health, age and the reason for surgery all shape the pace, and psychological confidence in the limb typically arrives last and unevenly.
Can you wear jeans with a prosthetic leg?
Yes. Many people wear ordinary jeans over a prosthesis. Looser cuts and stretch denim pull on and off more easily over a knee unit and foot, and some wearers sew a discreet zipper into an inner seam for access to the socket. Very tight jeans can restrict a mechanical knee or rub a liner sleeve, so it is worth trying a pair in the clinic before committing.
What are the prosthetic leg fitting stages?
The usual stages are limb preparation with a shrinker sock, shape capture by plaster casting or 3D scanning, a clear test socket checked under load, a preparatory prosthesis used for gait training, and a definitive prosthesis made once the limb has stabilized. Adjustments continue throughout, and sockets are replaced periodically over the years as the body changes.
What are the steps in the prosthetic eye fitting procedure?
An ocular prosthesis follows a different pathway from a limb. After the eye socket has healed from surgery, an ocularist takes an impression of the socket, creates a wax or acrylic model, checks its fit and eyelid position, then hand-paints the iris and blood vessels to match the other eye before final polishing. Follow-up adjustments and periodic polishing are part of ongoing care.
How often does a prosthetic socket need adjustment?
Frequently in the first year, then less often. Daily volume changes are managed by adding or removing sock plies yourself, while the prosthetist reshapes or pads the socket at appointments as the limb shrinks. When you need several plies at once to keep the socket snug, that usually signals the socket should be remade rather than padded further.
Why is my first prosthetic socket clear plastic?
Because the prosthetist needs to see your skin under load. Through a transparent test socket, areas being crushed stay white, areas being rubbed stay red, and gaps where skin is not touching plastic are obvious. These problems are corrected with a heat gun and padding on the spot, before the shape is committed to a durable laminated socket.
Does prosthetic casting hurt?
Casting itself is usually not painful. Warm plaster bandages are wrapped over a protective sleeve, and the prosthetist presses on specific areas while it sets to shape load-bearing zones. Recent surgical scars can be tender, so tell the prosthetist about sore spots beforehand; those areas are marked so the finished socket relieves them. Digital scanning involves no contact pressure at all.
What is gait analysis in prosthetic rehabilitation?
Gait analysis is systematic observation of how you walk, done by a physical therapist and prosthetist, sometimes with cameras or pressure-sensing walkways. They look for deviations such as a sideways trunk lean, a slapping foot or a hitched hip, then trace each to socket fit, alignment, component settings or muscle strength. Small alignment changes at the connectors can alter walking noticeably.
Who decides when I am ready for a prosthesis?
The rehabilitation team, which typically includes your physician, prosthetist and physical therapist. They assess wound healing, swelling, joint range, strength and cardiovascular fitness before recommending fitting, and some people are advised to wait or to pursue other mobility goals. The NHS and Johns Hopkins both describe this as an individualized decision made with the person rather than on a fixed schedule.
References
- MedlinePlus: Limb Loss
- MedlinePlus: Leg amputation – discharge
- MedlinePlus: Leg or foot amputation
- NHS: Amputation
This article is for general information only and is not a substitute for professional medical advice. Please consult a qualified doctor about your individual situation.

More from the Blog

How Do You Get Used to a Prosthesis? Wearing Schedules, Skin Checks and Early Training
Getting used to a prosthetic leg is gradual and supervised. Most rehabilitation programs begin with short wearing sessions of an hour or two, a…

Walking, Cycling, Massage, Chiropractic: What Helps Sciatica
Yes, walking is generally good for sciatica. Gentle, regular movement keeps the spine and hips mobile, eases muscle guarding, and is recommended by national…

The First Neurological Rehabilitation Assessment: What the Team Measures and Why It Sets Goals
A neurological rehabilitation assessment is the structured first evaluation a rehabilitation team makes after a stroke, brain or spinal cord injury, or a progressive…

What a Neurological Rehabilitation Program Includes: Movement, Speech, Swallowing and Thinking
A neurological rehabilitation program is coordinated therapy for people whose brain, spinal cord or nerves have been injured by stroke, trauma, multiple sclerosis, Parkinson's…

How Much Does Physical Therapy Cost? Session Pricing Explained
A single private physical therapy session typically costs EUR 30–130 in our guide range for international patients, compared with roughly GBP 45–120 at private…

What Recovery Usually Looks Like After Stroke Rehabilitation: Honest Expectations by Stage
Stroke rehabilitation results vary widely, but most measurable change happens in the first three months, when the brain's natural recovery is fastest and therapy…