

How Inlays and Onlays Are Placed: Shaping, Impressions, Lab Fabrication and Bonding Explained

Key Takeaways
- An inlay repairs the central chewing surface of a back tooth, while an onlay also rebuilds one or more of the raised cusps; both are made outside the mouth and bonded in.
- The cavity is shaped so its walls diverge slightly toward the opening, creating a single path along which the rigid restoration can be seated without catching.
- Impressions can be taken as a putty mold or a digital scan, and either can be sent to a laboratory or used by an in-office milling machine.
- Bonding relies on etching the enamel and treating the inside of the restoration so resin cement grips both surfaces; moisture contamination during this step is a leading cause of failure.
- Mild cold sensitivity after bonding usually fades over days to weeks, whereas spontaneous or lingering pain suggests the pulp may need assessment.
- The margin where restoration meets tooth is the most likely site of new decay, so daily flossing around that tooth and routine X-rays matter more after treatment, not less.
An inlay onlay procedure usually takes two visits. First, the dentist numbs the tooth, removes decay or an old filling, and shapes the cavity with smooth walls. An impression or digital scan is taken, a temporary is placed, and a dental laboratory makes the restoration from ceramic, composite or gold. At the second visit it is checked for fit and bonded in place with resin cement.
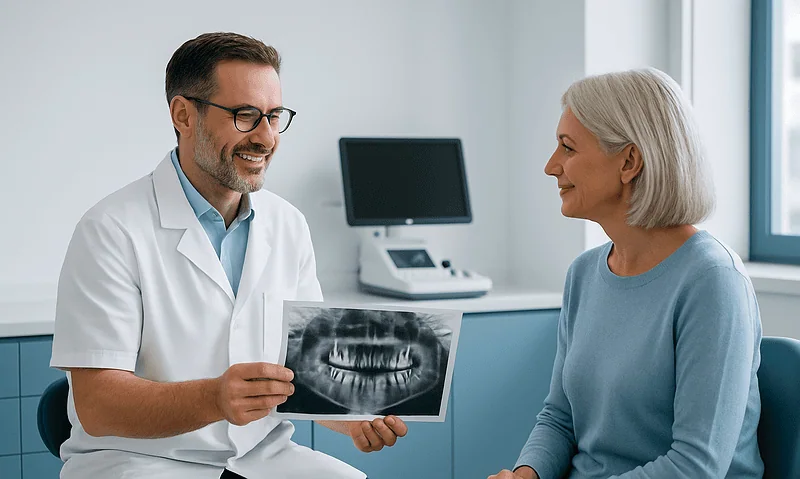
The X-ray is up on the screen and the dentist is pointing at a shadow under an old silver filling that has been there since college. The tooth is not broken. It does not hurt. But the filling has cracked at one corner, and the decay creeping beneath it has taken a chunk of the tooth wall with it. “Too much for another filling, not quite enough for a crown,” the dentist says. “I’d suggest an onlay.”
That sentence sends most people to their phones in the parking lot. What exactly is an onlay? How does an inlay onlay procedure differ from the filling that was placed in twenty minutes years ago? Why does it need two appointments, and what is a laboratory doing with a model of your tooth in between?
This explainer walks through the whole sequence, from the first injection to the final polish, using plain language and the evidence behind each step.
What is the inlay onlay procedure, in plain language?
An inlay is a custom-made piece that fits inside the chewing surface of a back tooth, sitting within the cusps (the raised points of the tooth). An onlay does the same job but extends over one or more of those cusps, replacing part of the outer wall as well. Both are called indirect restorations, which simply means they are made outside the mouth and then fixed onto the tooth, rather than being sculpted directly into the cavity like a conventional filling.
The distinction matters because it changes the entire workflow. A direct filling is soft material packed into a hole and hardened on the spot. An indirect restoration is designed to exact dimensions, fabricated as a single rigid piece, and cemented or bonded into a prepared space. The result is a restoration that can be shaped with greater control, especially where the tooth meets its neighbor and where chewing forces land.
The sequence is remarkably consistent across dental practices. The tooth is numbed and isolated. Decay and any failing filling material are removed. The remaining cavity is shaped so that the finished piece can slide in and out along one path. A copy of the prepared tooth is captured, either as a physical impression or a digital scan. A dental laboratory or an in-office milling unit produces the restoration. Finally, the piece is tried in, adjusted, and bonded.
Mainstream dental guidance describes fillings, inlays, onlays and crowns as a spectrum of options for repairing damaged teeth, with the choice depending on how much healthy structure remains (NHS). Inlays and onlays occupy the middle of that spectrum: more than a filling, less than a full crown.
Inlay vs onlay: what is the actual difference?
Picture a molar as a small four-cornered table. The cusps are the corners; the central pit between them is the surface where food is ground. An inlay repairs damage confined to that central area and perhaps the grooves running toward the edges. An onlay is required when at least one corner has been lost or weakened and needs to be rebuilt.
Dentists sometimes call a large onlay that covers all the cusps a “partial crown” or “overlay.” The terminology varies between practices, and it is worth asking your dentist to sketch which parts of the tooth will be replaced rather than relying on the label alone.
Why not simply place a crown, which covers everything? A crown requires the whole tooth to be trimmed down on every side, sacrificing healthy enamel to make room. An onlay is designed to keep the sound walls intact and replace only what is missing. The principle behind this approach is often described as minimally invasive dentistry: remove only diseased tissue and preserve as much natural tooth as the situation allows. Mayo Clinic’s overview of cavity treatment describes fillings, crowns and other restorations as choices scaled to the extent of damage rather than a one-size-fits-all answer (Mayo Clinic).
The practical differences show up in the chair. Inlays are generally smaller, quicker to shape and simpler to bond. Onlays take longer to prepare because the dentist must decide how much of each cusp to reduce, and the bonding surface is larger. Both follow the same overall workflow, so the rest of this article treats them together and flags the points where they diverge.
Who is an inlay or onlay usually for, and who is usually asked to wait?
The typical candidate has a back tooth with a moderate-to-large cavity, a cracked or worn-out filling, or a fractured cusp, while the remaining tooth structure is still strong. The nerve inside the tooth (the pulp) is healthy, the gums around it are sound, and the tooth is not already loose or heavily damaged.
People are commonly asked to wait, or to consider a different treatment, in several situations:
- Active gum infection or inflammation around the tooth. Bonding is difficult when the area bleeds, and treating gum disease first is standard practice.
- Signs the pulp is dying or infected, such as spontaneous, lingering pain or a visible abscess. Root canal treatment is usually assessed before any restoration is planned (NHS).
- Very little tooth left above the gum. When most of the crown of the tooth is gone, a full crown, sometimes with a supporting post, may be judged more reliable.
- Heavy grinding or clenching that has not yet been addressed, because rigid ceramic pieces can fracture under repeated overload.
- Ongoing high decay activity. If new cavities are appearing regularly, the treating team may prioritize diet, fluoride and hygiene changes before investing in laboratory-made restorations.
None of these is an absolute barrier. They are factors a dentist weighs alongside your medical history, how the tooth bites against its opponent, and what you can realistically commit to in follow-up care. The decision about whether an inlay or onlay is the right restoration for a particular tooth rests with the treating dentist after examination and X-rays, and a second opinion is a reasonable step if you feel unsure.
Step one: numbing, isolation and shaping the tooth
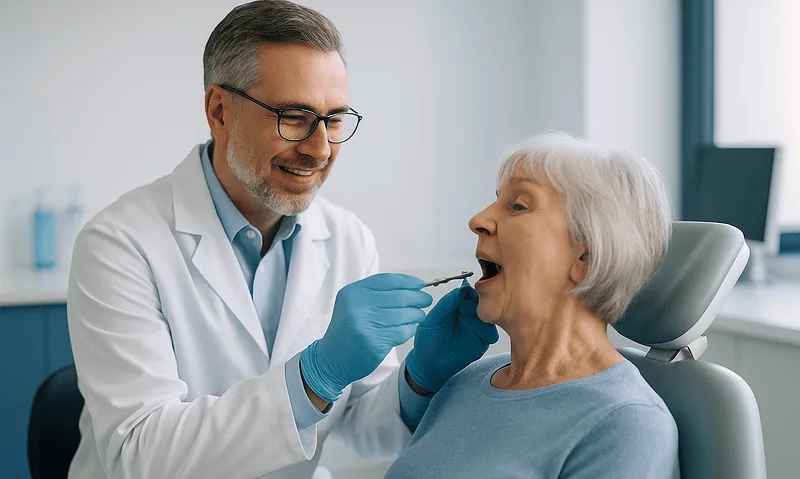
The first visit begins with local anesthetic, an injection near the tooth that blocks pain signals from the nerve for a few hours. Some dentists apply a numbing gel to the gum first so the needle is barely felt. Once the tooth is numb, the dentist isolates it, often with a thin rubber sheet called a dental dam that stretches around the tooth and keeps saliva away. Isolation matters more for indirect restorations than for many fillings, because moisture contamination weakens the eventual bond.
Shaping, which dentists call preparation, then begins. Any old filling is drilled out and soft, decayed dentin (the layer beneath the enamel) is removed until firm, healthy tooth is reached. The dentist checks the floor of the cavity with an explorer and sometimes a dye that stains decay.
The next part is the craft that distinguishes an inlay onlay procedure from a filling. The walls of the cavity are refined so they diverge slightly toward the opening, like a funnel. This creates a single path of insertion, allowing a rigid piece to slide in without catching. Sharp internal corners are rounded, because ceramic is prone to cracking at stress points. For an onlay, weakened cusps are reduced to a uniform thickness so the restoration can cap them. Enough space must be created for the material to have adequate bulk; too thin, and it may fracture.
If decay has reached very close to the pulp, a protective liner may be placed over that spot. The prepared tooth is then cleaned, dried and checked from every angle before the impression stage. This shaping phase commonly takes most of the first appointment, and its precision largely determines how well the final piece will fit.
Step two: impressions, digital scans and the temporary
Once the tooth is shaped, a record of it must travel to whoever will make the restoration. Two methods are in common use.
A conventional impression uses a soft, putty-like material loaded into a tray that is pressed over the teeth and held still for a few minutes while it sets into a rubbery mold. The dentist usually takes an impression of the opposing teeth as well, plus a record of how the jaws close together, so the laboratory can build a piece that meets the bite correctly. Some people find the tray uncomfortable or gag-inducing; breathing slowly through the nose and sitting upright often helps.
A digital scan replaces the tray with a small handheld camera that captures thousands of images of the prepared tooth and its neighbors, stitched together into a three-dimensional model on screen. The scan file can be sent electronically to a laboratory or used directly by an in-office milling machine. Digital methods avoid the mess and the gagging, though they still require a completely dry, blood-free field to capture the margins accurately.
Shade selection happens at this point for ceramic and composite pieces. The dentist compares small tabs against the neighboring teeth, ideally under natural light and before the tooth dries out, because dehydrated enamel looks lighter than it really is.
Finally, a temporary restoration is placed to protect the shaped tooth. It is made from a soft acrylic or composite material, molded roughly to shape and held with a weak cement that is designed to release easily at the next visit. The temporary keeps the tooth from being sensitive, stops neighboring teeth from drifting into the space, and lets you chew gently. It is not built for durability, which is why dentists ask people to avoid sticky or very hard foods on that side until the permanent piece is fitted.
Step three: lab fabrication, what happens between visits
The stretch between appointments feels like waiting, but a good deal of work is happening. If a physical impression was taken, the laboratory pours a stone or resin model from it, producing an exact replica of the prepared tooth and its neighbors. The models are mounted on a hinged device that reproduces how the jaws close, so the technician can check contacts with the opposing teeth.
From a digital scan, the same model exists as a file. The technician designs the restoration on screen, drawing its outline along the prepared margins, building up the chewing surface with grooves and cusps that mirror natural anatomy, and adjusting until the piece meets the opposing tooth evenly.
Fabrication then depends on material. Ceramic pieces are usually milled from a solid block by a computer-controlled cutter, or pressed from heated ceramic into a mold, then fired in a furnace and glazed to seal the surface and add luster. Composite inlays are built in layers and cured with intense light and heat, which produces a denser material than can be achieved in the mouth. Gold inlays are made by the lost-wax method: a wax pattern is carved on the model, invested in a plaster-like mold, burned out, and the resulting cavity filled with molten alloy.
Whatever the material, the technician then checks the fit on the model, adjusts the contact points against neighboring teeth so that dental floss passes with slight resistance, and polishes or glazes the surface. The restoration is disinfected and returned to the dentist.
The interval between visits varies with the laboratory’s workload and method, and dentists commonly describe it in terms of one to a few weeks. Ask your own practice for its expected timing rather than assuming a standard, and keep the temporary clean while you wait.
Step four: bonding day, how the restoration is fixed in place
The second visit is usually shorter than the first, but it is technically the most exacting. The dentist may numb the tooth again, since removing the temporary and cleaning the surface can cause sensitivity. The temporary is lifted off and residual cement is scrubbed away with a pumice paste.
The new piece is then placed without any adhesive, a step called the try-in. The dentist checks three things: that the margins sit flush with the tooth with no gap or overhang, that the contacts with neighboring teeth are snug but allow floss through, and that the shade blends. Small adjustments to the contacts may be made with fine polishing tools. The bite is deliberately not checked at this stage for ceramic, because pressing on an unbonded, unsupported piece can crack it.
Bonding follows a strict protocol. The tooth is isolated again and the enamel and dentin are treated with a mild acid gel for a set number of seconds, which roughens the surface microscopically so adhesive can grip. A bonding agent is painted on and cured with a blue light. The inside of the restoration is also prepared: ceramic is etched and coated with a coupling agent, gold is sandblasted, composite is roughened. Resin cement is loaded into the piece, which is seated with firm pressure. Excess cement is removed while still soft, and the light is applied from several directions to harden the cement throughout.
Only now is the bite checked, with thin colored paper that leaves marks where teeth touch first. High spots are polished down until contacts are even. A final polish smooths the margin so plaque has nowhere to lodge. Dental fillings and restorations rely on this kind of sealing at the margin to protect against new decay (Cleveland Clinic).
Same-day versus two-visit inlay onlay procedure: what changes?
Some practices own a chairside milling system, which lets them scan, design and cut a ceramic inlay or onlay while you wait, completing the whole inlay onlay procedure in a single, longer appointment. Others send the case to an outside laboratory and see you again a week or more later. Neither approach is inherently superior; they trade different advantages.
With a same-day workflow, there is no temporary and no second injection. The tooth is shaped, scanned and restored within a few hours. The design is done on a screen in the office, and you may even watch the block being milled. Some materials require a short furnace cycle after milling to reach full strength and to develop color, which adds time to the visit.
A two-visit workflow allows a technician to layer ceramic by hand, which can matter for teeth in visible positions where fine color matching is a priority. It also suits gold and pressed ceramics, which are not milled chairside. The temporary phase gives a period of adaptation, during which any pulp sensitivity from the preparation can be observed before the final piece is bonded.
Points that do not change between the two approaches: the tooth must be shaped to the same standards, isolation must be equally thorough, and the bonding steps are identical. The choice usually comes down to the equipment available, the material judged best for the tooth, and your own scheduling needs.
If your dentist proposes one method, it is reasonable to ask why that route was chosen for this particular tooth, what the alternative would involve, and whether the material differs between the two. The decision remains with the treating team, informed by the specific tooth rather than by a general preference.
Ceramic, composite or gold: which material and why?
Three material families are used for inlays and onlays, and each behaves differently in the mouth. The table below summarizes the properties dentists weigh when they recommend one.
| Material | How it is made | Main strengths | Main limitations |
|---|---|---|---|
| Ceramic (porcelain, lithium disilicate, zirconia) | Milled or pressed, then fired and glazed | Tooth-colored, stain-resistant, bonds well to enamel | Rigid; can chip if too thin or under heavy grinding; abrasive to opposing teeth if left rough |
| Laboratory composite resin | Layered and heat/light cured outside the mouth | Tooth-colored, easier to repair, gentler on opposing teeth | Wears faster than ceramic; may stain over years |
| Gold alloy | Cast by the lost-wax method | Very durable, wears at a rate similar to enamel, precise margins | Metallic color; relies on cement rather than true bonding |
Ceramic dominates current practice for back teeth because it combines appearance with the ability to bond chemically to enamel, which strengthens the remaining tooth. Gold remains a respected option for people who prioritize longevity over color, especially on second molars that never show. Composite sits between them and is sometimes chosen where the opposing tooth is already worn or restored.
Dental guidance on fillings lists tooth-colored composites, ceramics and metal alloys as established restorative materials, each with recognized advantages and trade-offs (Cleveland Clinic). No single material is right for every tooth. The recommendation depends on how much tooth is left, how heavily you bite, whether you grind, the position of the tooth, and your own preferences about appearance, all of which your dentist should be able to explain in relation to your case.
What the following days and weeks usually look like
Leaving the first appointment, the numbness lasts a few hours. Chewing on the numb side risks biting the cheek or tongue without realizing it, so most dentists suggest waiting until sensation returns before eating anything that needs chewing. The temporary may feel slightly high or rough; minor roughness is normal, but if the temporary comes off entirely, call the practice, because the exposed tooth can become sensitive and neighboring teeth can shift within days.
After bonding, the tooth often feels different for a while. The new chewing surface has crisp anatomy where the old filling or worn tooth was flat, and the tongue notices. This typically settles as the brain recalibrates. Mild sensitivity to cold is common after any deep restoration and generally fades over days to a few weeks as the pulp recovers from the preparation and the bonding chemistry. Sensitivity that worsens rather than eases, or that lingers long after the cold stimulus is gone, warrants a call.
Bite feel is the other common adjustment. If the tooth seems to hit before the others when you close, or aches when you chew, the restoration may be a fraction high. This is easily corrected with a brief polishing appointment and should not be tolerated in the hope it will wear in, because a persistently high spot can bruise the ligament around the root.
Home care returns to normal immediately after bonding: brushing twice daily with fluoride toothpaste and cleaning between the teeth once a day, as recommended for all teeth (NHS). The margin where restoration meets tooth is the most vulnerable point for new decay, so flossing around that tooth matters more, not less. Routine check-ups let the dentist inspect the margins and take periodic X-rays to look beneath the restoration.
Risks and complications, and how they are handled
Inlays and onlays are routine procedures, but like every dental treatment they carry recognized risks, most of them minor and manageable.
Postoperative sensitivity is the most frequent. Removing decay close to the pulp irritates the nerve, and the etching and bonding steps can add to this. In most cases it resolves without treatment. Occasionally the pulp does not recover, particularly when decay was deep, and the tooth develops persistent pain or infection that requires root canal treatment. Your dentist should tell you before treatment if the cavity is deep enough to make this a realistic possibility.
Fracture of the restoration can occur, especially with ceramic under heavy chewing forces or grinding. A small chip may be smoothed or repaired; a larger fracture usually means replacement. Fracture of the remaining tooth is less common but possible when thin walls were left unprotected.
Debonding, where the piece loosens or comes off, is uncommon when isolation and bonding were thorough. If it happens, keep the piece and contact the practice, because it can often be cleaned and rebonded.
Recurrent decay at the margin remains the long-term concern for any restoration. Plaque accumulating at a rough or open margin allows bacteria to dissolve the tooth beneath, a process described in general terms in cavity guidance (NIH NIDCR). Good home care and regular examination are the defenses.
Rare complications include allergic reaction to a material component and injury to the soft tissue from instruments or the dam clamp. Tell your dentist about known metal or resin allergies before the material is chosen. Every risk should be discussed in advance, and the treating team decides how each one is best managed if it arises.
Alternatives: a larger filling, a crown, or watchful waiting
An inlay or onlay is one option among several, and understanding the alternatives helps make the recommendation meaningful.
A direct composite filling can often handle moderate cavities in a single visit at lower biological cost, since no additional shaping for a path of insertion is needed. Its limitations appear as cavities grow: composite placed in bulk shrinks slightly as it hardens, making tight contacts and sealed margins harder to achieve in very large cavities. Dentists commonly move to indirect options when the filling would occupy more than a certain proportion of the chewing surface or replace a cusp, though the exact threshold is a judgment rather than a rule (Mayo Clinic).
A full crown covers the entire visible tooth and is the standard answer when little sound structure remains or the tooth has had a root canal and needs bracing against fracture. Its drawback is the amount of healthy tooth removed all around to make room. Where the walls are still strong, an onlay preserves them.
Watchful waiting is appropriate only for early, non-cavitated lesions confined to enamel, where fluoride, diet change and monitoring may arrest progression. Once decay has broken through the enamel into dentin, waiting allows the cavity to enlarge and the pulp to become involved, so active treatment is generally advised.
Extraction is rarely the first choice for a restorable tooth, but for a tooth with a split root or hopeless prognosis it may be discussed alongside replacement options.
The alternatives are not competing brands; they are tools calibrated to the amount of damage. A good consultation lays out which of them realistically apply to your tooth and why one is favored, leaving the final choice with you and your treating team.
How long do inlays last? What the evidence actually shows
This is the question almost everyone asks, and the honest answer is that no guideline body publishes a fixed figure, because longevity depends on variables that differ from mouth to mouth.
What the broader literature on indirect restorations consistently shows is that survival is influenced by the material chosen, the amount of enamel available for bonding, the quality of isolation during cementation, the presence of grinding, and above all the patient’s ongoing decay risk and hygiene. Restorations placed in people with low decay activity and good plaque control tend to outlast identical restorations in people with frequent new cavities. This is why dentists focus so heavily on prevention before and after placing a laboratory-made piece.
General consumer health sources describe fillings and other restorations as lasting many years but eventually needing replacement due to wear, fracture or decay at the margins (Cleveland Clinic). Gold has the longest track record, ceramic has become the dominant modern choice, and laboratory composite is generally expected to wear sooner than either. Beyond those directional statements, any precise number of years quoted to you should be treated as an estimate based on your dentist’s experience, not a guarantee.
Practical factors that extend the working life of an inlay or onlay are well established: cleaning the margins daily, wearing a night guard if grinding has been diagnosed, avoiding using teeth as tools, and attending check-ups so that small marginal problems can be addressed before they become failures. Each of these is within the patient’s control, which is a more useful thing to know than any single durability figure.
What people often get wrong about inlays and onlays
Several persistent ideas about the inlay onlay procedure deserve correcting.
“An onlay is just an expensive filling.” The difference is not price but engineering. A filling is soft material hardened inside the tooth; an onlay is a rigid, laboratory-fabricated piece bonded to a precisely shaped preparation. They behave differently under load and seal differently at the margin.
“It’s the same as a crown, only smaller.”
A crown removes tooth structure on every surface. An onlay is specifically designed to leave sound walls untouched. Choosing one over the other changes how much of your natural tooth survives the treatment.
“The temporary is only cosmetic.” It protects exposed dentin, holds the space so neighboring teeth do not drift, and keeps the opposing tooth from moving into the gap. Losing it and doing nothing for a week can compromise the fit of the final piece.
“Once it’s bonded, the tooth can’t decay.” The restoration itself cannot decay, but the tooth around and beneath it can, most often at the margin. Restorations do not remove the need for fluoride toothpaste and interdental cleaning (MedlinePlus).
“Ceramic is always better than gold.” Ceramic looks better. Gold has a longer history of durability and is gentler on opposing teeth. Which is “better” depends on the tooth’s position, your bite and your priorities.
“Sensitivity after bonding means something went wrong.” Mild, short-lived cold sensitivity is a normal response to preparation near the pulp. It is worsening or spontaneous pain that signals a problem.
“Same-day restorations are lower quality.” Chairside milling produces restorations to the same dimensional standards as a laboratory. The trade-offs are about material options and color layering, not about basic quality.
Questions to ask your care team before you agree
A short list of questions, asked before the first injection, turns a recommendation into an informed decision. Take these to your consultation and note the answers.
- Why an inlay or onlay rather than a direct filling or a full crown for this particular tooth? Which parts of the tooth will be replaced?
- How close is the decay to the nerve, and what is the realistic chance the tooth may later need root canal treatment?
- Which material do you recommend, and what are the trade-offs against the alternatives for a tooth in this position?
- Will this be made chairside in one visit or by a laboratory over two visits, and what determined that choice?
- How long is the expected gap between appointments, and what should I do if the temporary comes off or breaks?
- Will a rubber dam or other isolation be used during bonding?
- Do I show signs of grinding or clenching, and should a night guard be considered to protect the restoration?
- What sensations are normal in the first weeks, and which ones should prompt me to call?
- How will the margins be checked at future visits, and how often would you like to see me?
- If the restoration chips or loosens later, what are the usual options for repair versus replacement?
Good clinicians welcome these questions; they signal a patient who will look after the work. If any answer is unclear, ask for it to be shown on the X-ray or a model. The purpose is not to second-guess the dentist but to understand the plan well enough to follow it and to recognize when something needs attention. The final treatment decision remains a shared one between you and the treating team.
When to call your doctor
Most people move through an inlay onlay procedure with nothing more than a few days of mild sensitivity. Certain signs, however, should prompt a call to your dental practice, or to urgent medical care if they are severe or occur outside office hours.
Contact your dentist promptly if you notice any of the following:
- Pain that starts on its own, wakes you at night, or lingers for minutes after hot or cold, which can indicate the pulp is inflamed or infected rather than simply irritated.
- Swelling of the gum, cheek or jaw near the treated tooth, or a pimple-like bump on the gum that drains, which are signs of infection that may need urgent treatment (NHS).
- The temporary or the final restoration comes loose, chips or falls out.
- A persistent feeling that the tooth hits first when you close, or aching when chewing that does not settle within a few days.
- Bleeding, soreness or a bad taste at the gum margin around the tooth that continues beyond the first day or two.
- Numbness that has not faded many hours after the anesthetic should have worn off.
Seek emergency care immediately, rather than waiting for a dental appointment, if facial swelling spreads toward the eye or neck, if you develop a fever with dental pain, if swallowing or breathing becomes difficult, or if you have a rash, wheezing or lip and tongue swelling shortly after treatment, which may indicate an allergic reaction. Dental infections can spread rapidly in these situations and are treated as medical emergencies.
When in doubt, call. Dental teams would far rather assess a concern early than discover a problem months later at a routine check-up. Whatever the finding, the next step is decided by the clinician who examines you.
Frequently asked questions
What is a dental onlay, and how is it different from a crown?
A dental onlay is a custom-made restoration that replaces the chewing surface and one or more cusps of a back tooth while leaving the sound outer walls intact. A crown covers the entire visible tooth and requires all surfaces to be trimmed down. An onlay is chosen when enough healthy structure remains to be worth preserving; a crown is chosen when it does not.
What are the onlay procedure steps from start to finish?
The tooth is numbed and isolated, decay or old filling material is removed, and the cavity is shaped with a single path of insertion. An impression or digital scan is taken, a temporary is placed, and a laboratory or milling unit fabricates the piece. At the next visit it is tried in, the tooth and restoration are etched and primed, resin cement is applied, and the bite is adjusted and polished.
Does the inlay onlay procedure hurt?
The tooth is numbed with local anesthetic before any drilling, so the shaping itself should not be painful, though pressure and vibration are felt. Mild soreness at the injection site and cold sensitivity in the tooth are common afterward and usually fade. Pain that starts on its own or lingers after cold should be reported to the dentist for assessment.
How long do inlays last compared with fillings?
No guideline publishes a fixed lifespan, because longevity depends on material, how much enamel was available for bonding, grinding habits and ongoing decay risk. Consumer health sources describe all restorations as lasting many years before eventual wear or marginal decay requires replacement. Gold has the longest track record, ceramic is the common modern choice, and laboratory composite generally wears sooner.
Inlay vs onlay: how does the dentist decide which one I need?
The decision hinges on whether any cusp has been lost or weakened. If damage is confined to the central pit and grooves, an inlay is sufficient. If one or more cusps are cracked, thin or already missing, an onlay is needed to cap and reinforce them. Your dentist assesses this from the X-ray and from what is found once old filling material is removed.
Why do I need a temporary between appointments?
The temporary protects exposed dentin from sensitivity and bacteria, holds the space so neighboring teeth do not drift, and prevents the opposing tooth from moving into the gap. If it comes off, the final restoration may no longer fit precisely. It is held with weak cement by design, so avoiding sticky and very hard foods on that side is sensible.
Can an inlay or onlay be done in one visit?
Yes, in practices equipped with a chairside scanner and milling unit, a ceramic inlay or onlay can be designed, milled and bonded within a single longer appointment. Gold and hand-layered ceramics still require a laboratory and a second visit. Both routes follow the same shaping and bonding standards; the difference lies in material options and scheduling.
What can I eat after an inlay or onlay is bonded?
Resin cement is fully hardened by the curing light before you leave, so normal eating can resume once any anesthetic has worn off. Waiting for sensation to return prevents accidental biting of the cheek or tongue. Very hard foods, ice and using the teeth as tools are best avoided long term to protect ceramic from chipping.
Is sensitivity after an onlay normal?
Mild sensitivity to cold in the days to weeks after bonding is common, because preparation and bonding chemistry irritate the pulp temporarily. It should gradually ease. Sensitivity that worsens, pain that appears without a trigger, or discomfort when biting that does not settle within a few days should be assessed, as it may indicate a high spot or pulp inflammation.
Can a tooth decay under an inlay or onlay?
The restoration cannot decay, but the natural tooth at its margins can if plaque accumulates there. Daily brushing with fluoride toothpaste, cleaning between the teeth, limiting sugary snacks and attending check-ups with periodic X-rays are the established defenses. Well-sealed margins and good home care together give the tooth its best chance of remaining sound beneath the restoration.
References
- NHS: Tooth decay
- Cleveland Clinic: Dental fillings
- NIH National Institute of Dental and Craniofacial Research: Tooth decay
- MedlinePlus: Tooth decay
This article is for general information only and is not a substitute for professional medical advice. Please consult a qualified doctor about your individual situation.

More from the Blog
Imaging in Implantology: How Panoramic X-Rays and 3D Scans Guide Implant Position and Depth
Implantology imaging combines two-dimensional dental X-rays, most often a panoramic film, with a three-dimensional cone beam CT (CBCT) scan when the clinician needs to…

Why Jaw Growth Decides When Implantology Can Place an Implant in a Younger Patient
Dental implants for teenagers are usually postponed until the jaw has stopped growing, because an implant fuses to bone and cannot move with the…
How Mini Implants Are Placed: Flapless Insertion, Same-Day Denture Fitting and What to Expect
A mini implant procedure places one or more narrow titanium posts into the jawbone, usually through a small pierce in the gum rather than…

All On 4 Healing Timeline: Soft Diet Weeks, Bone Integration and the Final Bridge Switch
All-on-4 healing usually unfolds in stages. Swelling and soreness peak in the first two to three days and settle over one to two weeks,…

Mini Implant Problems Explained: Loosening, Wear of Denture Attachments and When to Call
Mini implant problems most often fall into three groups: the implant itself loosening because bone has not bonded to it or has later receded,…

All On 6 Problems Explained Honestly: Screw Loosening, Bridge Fractures and Gum Inflammation
All on 6 problems usually fall into three groups: mechanical issues such as a loosened prosthetic screw or a chipped or fractured bridge, biological…